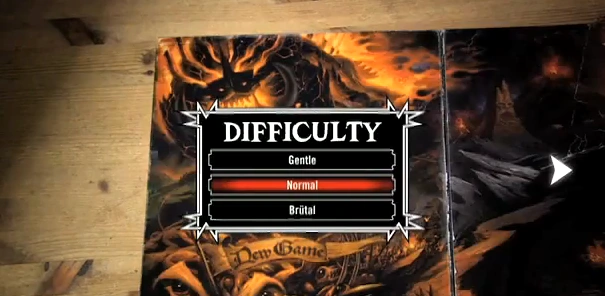
This walkthrough covers all twenty-two story missions in Brütal Legend, on Brütal difficulty. As such, it contains spoilers, and players should read on at their own risk.
Welcome to the Age of Metal[]

Eddie Riggs, roadie for the band Kabbage Boy, is seen tuning a guitar. The guitarist approaches him and tries to wind him up, but Eddie simply hands back his fixed guitar and the guitarist storms off in a huff. Then the lead singer talks to Eddie about building a new stage that would speak more to the band's 'tween demographic', before going on stage to sing "Girlfriend". Eddie speaks to another roadie, wishing that he was born earlier. Eddie then spots the guitarist on top of the Ormagöden statue from which he soon falls off, forcing Eddie to rush into action to catch both the guitar and its player. After the guitarist runs off, Eddie is crushed underneath the Ormagöden stage, which collapses. Blood soon ends up on his belt buckle, and the real Ormagöden appears, kills the band (except for the bassist, who manages to escape) and takes Eddie away...
Eddie then wakes up in the Temple of Ormagöden, where red-hooded Druids are worshipping something. Eddie tries to talk to them but they draw daggers and advance on him.
Gameplay: Go down the stairs to the floor below, run over to the axe embedded in the ground and press Y to pick it up. If you want, you can walk around avoiding the Druids to hear Eddie trying to pacify them, though they ignore him of course.
When you have it, use A to attack and kill the Druids, then head back up the stairs to kill one trying to pick up your guitar. Grab the guitar with Y, then use X to hit the Druids with Shocker lightning strikes, or hold X down to blast them off the ground with a Pyro attack. Use your axe and guitar attacks to kill them and you will eventually learn how to block attacks (B) and how to perform the Earthshaker (A+X). Druids will constantly gate in as you kill them, so take as long as you want to get used to using your axe and guitar. When you are ready, use the Earthshaker 3 or 4 times to collapse your surroundings and trigger a cutscene.
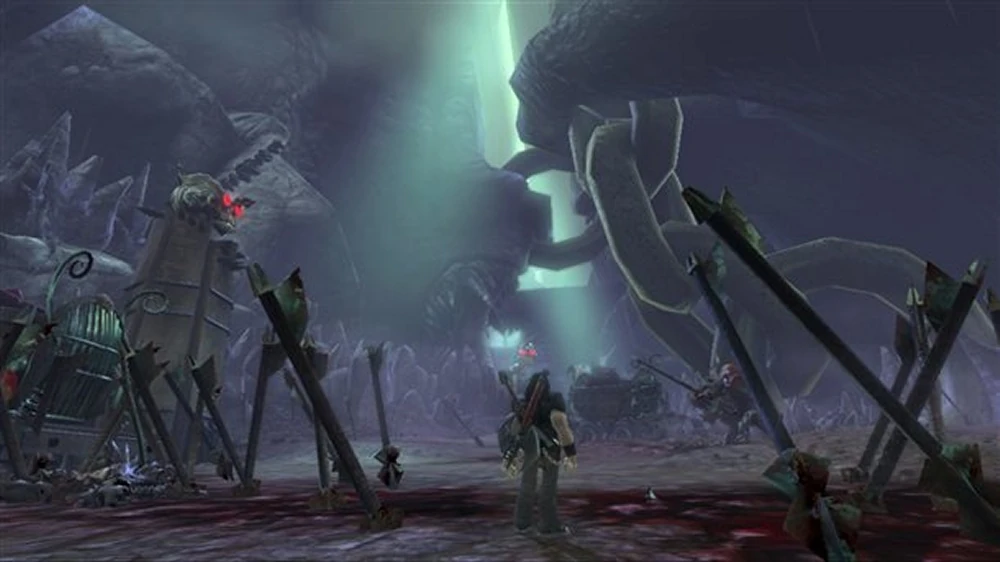
Cutscene: The camera zooms out and Eddie sees that he is on a huge skull pile in the middle of some strange new land. A walking altar comes up one side of the pile and Eddie sees what looks like a nun on it, but he knows better and calls it out as a demon. The demon, a Battle Nun, turns around, comes down off the altar and roars at Eddie, breaking his contemplations on how sexy it is.
Gameplay: The Battle Nun will attempt to roar at you and stun you for a short time, but it telegraphs when it will do this, so just move away when you see it getting ready. Druids will also gate in to help the Nun, but you only have to kill the Nun to escape (though you can kill the Druids if you want).
When you are done with the enemies, move up to the altar the Battle Nun came on and press Y. Walk all the way down the hill - if you stop moving, you can listen to Eddie trying to think of what to say to make the altar move. When you get to the bottom, you will fall off and be trapped in a rune light. Kill the Druids that appear, or use the Earthshaker to make the car parts chained up above fall on them, which will take out most, if not all of them, at once. Attack the remaining Druid with your axe (guitar attacks have no effect) and it will block your attack and go to a cutscene.
Cutscene: The Druid's hood falls down, revealing Ophelia. They talk briefly about Eddie's new axe, while killing Druids who attempt to sneak up behind them, then team up to escape the Temple together.
Gameplay: After the cutscene, you need to make your way around the temple. You will be attacked by Battle Nuns and Druids as you go. Ophelia will help you kill them, but you can use her Double Team attack to kill Druids instantly and severely injure the Nuns. Press Y when you are near Ophelia and see the picture prompt for her Double Team, and she will jump into your arms. Press A to make her leap off and spin her blades around, chopping up any enemies that she hits. You can also use an Earthshaker near the motors hanging on chains and they will fall off, crushing any enemies below them. Once you have killed them all, head on over to the door at Ophelia's prompting for the cutscene.
Cutscene: Eddie sees a large force of Battle Nuns and Druids outside - one tries to claw at him but Ophelia sticks one of her shortswords through its hand, nailing it to the door. They then turn around to examine their surroundings for another way out.
Gameplay: Head over to where you can see the red thistles growing and you will be granted the Relic Raiser Guitar Solo. This raises up objects from the ground wherever the red thistles, or Devil Thorns, are growing. To play the solo, hold RT, highlight the Relic Raiser from the menu and press A. You will then see the notes you need to play to perform the solo, represented by the Y, X and A buttons. When you play the first note, a bar will begin moving across the music sheet. Time your button presses so that you hit them when the bar is passing over them - if you mistime it, a skull will appear and if you miss too many notes, your guitar will overheat and the solo will be cancelled.
When you play the solo successfully, a cutscene will start.
Cutscene: Eddie will, somehow, assemble a fully-functioning hot rod from the car parts raised by the solo in less than ten seconds. Once he is done, he stands back to admire his work - christening it the 'Druid Plow' - then jumps in to explain how it works. Before he can though, Ophelia sheds her Druid robe, revealing herself in her normal clothes and distracting Eddie. Once he starts the car's engine though, Ophelia is startled, but jumps in as the enemies bang on the door.
Gameplay: Use the RT to accelerate and the LT to brake (or reverse if you are not moving). Drive through the doors and head down the road. Bowl through any enemies in your way. The only things that will stop you when you hit them will be the Hate Cages, the really tall-legged beasts, so drive around them. Once you reach the end of the road, you will ramp off into a circled area. There will be a short cutscene where Ophelia jumps out to open the gate, while a few Druids attempt to stop you. Kill them and another cutscene will start.
Cutscene: Eddie lights a cigarette while he waits for Ophelia. However, behind him, a giant, worm-like creature comes down, hovering just behind him. When Eddie turns around and sees it, it roars, blowing the cigarette out of his mouth and sending him running back into the Druid Plow.
BOSS: Lamphrey[]
You must keep driving around the area in a circle. The Lamphrey will first hover over your car, roaring, then it will suddenly move away, at point Eddie will make a comment like "Here she comes!". As soon as you hear it, press in the LS to activate your Nitro and try not to turn too much or hit anything. If you do it right, the Lamphrey will miss you and get stuck on the ground. At this point, hold B to use your handbrake and turn your car around quickly, then drive through one of the three tongues the Lamphrey's mouth is stuck down by. If you are having trouble hitting them with the car, you can also jump out (press Y) and attack one with your axe to sever it. However you do it, when you cut one, or if you take too long, the Lamphrey will pull free and repeat the pattern. Cut off all three of its tongues to defeat it.
If it does hit you, you will be spun out quite crazily and possibly thrown out of your car. If that happens, get back in (Y) and get back up to speed so you can try again.
Cutscene: Eddie and Ophelia talk; eventually Ophelia will tell Eddie the gate is open. The Lamphrey will come to its senses at that point and Ophelia will provoke it over to the gate. You will be in control of Eddie again, but all you have to do is use an Earthshaker to bring the gate down on the Lamphrey.
The gate will go through its neck, and Eddie will yell out 'DECAPITATION!' while powersliding in front of the camera. He then talks with Ophelia, but the Lamphrey is still alive and begins thrashing around, knocking down the gatehouse Eddie and Ophelia are standing in. However, once it all comes down, the Druid Plow flies out to land on the bridge that was at the other side of the gate (with Eddie and Ophelia doing their best to imitate a Bat Out of Hell album cover).
Gameplay: Now you must cross the breaking bridge. Listen in to the directions Ophelia gives you or you have to start again at the beginning of the bridge. Keep an eye out for pieces of the road that flick up to form ramps, as you will need to ramp over gaps in the bridge with these. Hit your Nitro if you don't think you are going fast enough to make one.
If you wish to know the directions to go:
- 1 - Go to the Right
- 2 - Head straight on over a jump
- 3 - Then there will be a bigger jump
- 4 - Go to the left side, and then ease your way over to the right
- 5 - You can either take the left or right jump, but I would advise taking the right jump
- 6 - Then go to the right side
- 7 - Then go to the edge of either the left or right side
- 8 - Then take the jump in the middle
- 9 - Head to the right side of the bridge
- 10 - Then the direct middle jump and when you land, you will just jump over the final leap.
Cutscene: Eddie and Ophelia talk again, and she says how she 'can't wait to show it to Lars'. Eddie looks disappointed as they drive off.
The scene then moves back to the temple, where we see the corpses left in Eddie's wake. A Warfather talks with the Emperor of the demons, Doviculus, speculating on who the killer is. Doviculus, who is examining the blade left behind by Ophelia, declares it is 'Succoria' as he can smell her blood, and that she is back to start a war.
Exploited in the Bowels of Hell[]

Gameplay: You are technically able to free-roam after you are told how to use the map, and how the spotlight marks your current destination as set on it. Ophelia will start complaining if you start wandering around, so to save yourself the trouble, follow the road and head over to the light, and you will end up in Bladehenge.
Cutscene: Ophelia introduces Eddie to Lita and Lars Halford and they soon get to talking about Eddie's job over a meal. Eddie mentions that his belt buckle was responsible for bringing him to this world and it is revealed that the buckle is a depiction of Ormagöden, the legendary creator of the Brütal Land. Lars, Lita and Ophelia talk about a legend that says Ormagöden will bring a warrior into their world that would be either their saviour or destroyer. Eddie also learns that even though Lars would like to fight back against the demons, General Lionwhyte has taken the men of the army and turned them into slaves and the women have been taken as slaves in his "pleasure tower". Eddie decides to help them, starting by freeing the men enslaved in Lionwhyte's Crushing Pit mine.
Gameplay: When you start, a Tab Slab will be right in front of you, which when read with Y, gives you the power to summon your Druid Plow, or Deuce, anytime you want it with a guitar solo. Each Tab Slab you find teaches you a new solo, so be on the lookout for them around the world.
At this point you are on free roam, so you can explore as much or as little of the surrounding land as you want. Try finding a few Bound Serpents, Artifacts of Legend, Landmark Viewers or Lightning Plug Jumps, which will grant you Fire Tributes, the game's currency. You can spend these at a Motor Forge, one of which is along the road leading from Bladehenge to the Crushing Pit. Raise them up with a Relic Raiser solo, then drive in to access the store.
When you are ready to start the mission, drive over to the spotlight and talk to Lars.
Cutscene: Lars shows Eddie the mine and they talk, after which you will acquire the Battle Cry solo. You will need this to progress through this mission and it will also give your nearby allies an increase in attack power if you play it during combat.
Gameplay: Walk over to where the Headbanger miners are working on the wooden scaffolds. If you want, you can stand around to hear Eddie try to get their attention. Some of the slightly different-looking miners, Hairbangers, will slag Eddie off if he talks to them. When you are ready, play the Battle Cry solo to trigger a cutscene.
Cutscene: The power of the solo stirs the Headbangers from their mindless labor and they finally start paying attention to Eddie. The Hairbangers, however, resist it, trying to convince the Headbangers that their work will pay off for all of them soon. The Headbangers choose to side with Eddie and this prompts the Hairbangers to call for the Bouncer guard, who attacks, under the impression that Eddie is trying to form a worker's union.
Gameplay: The Bouncer attacks, but the Headbangers will defend themselves. Assist them, and once the Bouncer falls, another cutscene will start.
Cutscene: Here, Eddie teaches the Headbangers (and the player) how to use the D-Pad to give unit commands, which are:
- Left = Follow: a purple spotlight will shine on you and your units will group up around you and follow, attacking any enemies who come near. They will usually break off and come back to you if you start getting too far away from them.
- Up = Charge: your units will charge forward as far as the point where the red spotlight is shining, attacking anything they encounter nearby. They will usually follow enemies that move away until they have killed them, and then will return to the red spotlight. The command will automatically target anything significant in the direction you are facing when you use it.
- Down = Defend: a blue spotlight will shine on you and your units will take up a defensive position at that spot, with combat units towards the front and support ones at the back, based on the direction you are facing when you give the order. They will chase enemies a short distance from the defending position, but will always return if they move too far away.
Gameplay: Using your new unit commands, order your Headbanger allies to attack the cart blocking your way ahead. As you move forward, keep an eye open for other Headbangers and recruit them to your squad with the Battle Cry solo. Once you move far enough, you will see a short cinematic in which the Pit Boss is overseeing the Headbangers working over on the Grinding Gyre. Once you have control again, move forward and recruit any nearby Headbangers, then order them to destroy the carts blocking your path. Once you do, move down towards the lava pool surrounding the Gyre and defeat the Hairbangers who are called out to stop you.
After that, you will have a short cutscene where the Pit Boss, Mittens, will order his men to destroy the Gyre to prevent the other Headbangers being freed. You will need to protect the supports holding up the gyre from groups of Hairbangers and Bouncers.
When you have control, run towards the supports that are being attacked and kill the enemies you encounter. At times, you will have to command your Headbangers to attack one group of enemies while you attack another in order to prevent the supports from being destroyed. Maintain your defense of the Gyre and you will eventually repel the attacks and trigger a cutscene.
Cutscene: Eddie confronts Mittens up on the mining platform. Although Mittens shows that he still has his 'managers' FEAR and PAIN to rely on, Eddie only responds by flicking away his cigarette.
BOSS: Mittens[]
Gameplay: Mittens is fairly simple, though you cannot attack him head on. Lure him under the coal lines, and when the coal canisters are about to pass over him, use an Earthshaker to shake open the buckets and shower him with hot coal. This knocks him down, allowing you to get some axe hits in. The easiest way to make him stay under the coal line is to use a Shocker, which forces him into a block stance where he is immobile. Avoid standing under the coal line yourself, because they can damage you too, even if you do not use Earthshakers, as the boss has a similar move of his own. Repeat this until you trigger a cutscene.
Cutscene: An banged-up Mittens calls for backup through his headset, but is knocked into the lava and burned up, leaving behind only his headset, which falls onto a rock. The Headbangers start celebrating, but the doors open and hordes of Bouncers pour into the cavern, far too many for them to defeat. Eddie needs a lot more to help.
Gameplay: You regain control here, but you do not have to do much. Simply run up to the rock where the headset is and play the Battle Cry solo to go to a cutscene where the entire legion of Headbangers on the Gyre have just heard the solo. They promptly jump off and control is returned to you, only now, you have a massive horde of buffed Headbangers assaulting the Bouncers who remain. Help them if you wish and once all the Bouncers are defeated, you will go to the final cutscene of the mission.
Cutscene: Now that all the Headbangers have been freed with the Battle Cry, Eddie has the first part of his army for Lars. In honour of the iron skulls his new allies possess, Eddie names the army Ironheade and sends them back to Bladehenge, granting you your first Brutal Victory.
Kill Master's Mercy[]
Cutscene: When Eddie arrives back at Bladehenge, the Headbangers have arrived and met Lars and Lita. Ophelia is absent but just as Eddie wonders where she is, she appears, badly wounded. Lars sees the only way to save Ophelia's life is to take her to the Kill Master, a reclusive medicine man living on Tophat Mountain. Lita protests, but Lars sets off, with Eddie following.
Gameplay: Drive to the spotlight, taking time to stop in at a Motor Forge if you wish to purchase anything with your current Fire Tributes. You can also earn Fire Tributes by helping any of your troops on patrol around the world defeat enemy patrols they encounter. Anyway, when you reach the spotlight, talk to Lars to start the mission.
Cutscene: Lars will tell Eddie a little about the Kill Master and the Metal Spiders he keeps with him. He also informs Eddie that there are Lionwhyte loyalists blocking the path up, but Eddie is more than ready to take care of them if they get in the way.
Gameplay: You will find yourself at the foot of the mountain, with Lita and a group of Headbangers who have shown up to help. Move up and you will soon be confronted by Hairbangers. Kill them, and remember that you can Double Team with both the Headbangers (they crowd around Eddie in a mosh pit) to easily dispatch these enemies. Lita and Lars don't yet allow you to Double Team with them (Lars is carrying Ophelia and Lita just refuses).
Follow the path up, defeating Hairbangers, and you will soon encounter new enemies, a Punishing Party, standing out of reach on a high rock. The Dominatrices (girls) will throw spears at you from a distance, but the Slave (large guy with a ball gag) does not attack, so feel free to ignore him. Block their attacks and run forward between blocks until you are close enough to use guitar attacks on them. Use Shockers to stun and kill them one by one, or use Pyros to knock them off the rock for your allies to attack. When all the Dominatrices are dead, the Slave will finish himself off.
Continue up and repel the next ambush, which contains a few Bouncers, so target and kill them off first. Once you go a little further, someone will call out 'Stampede!' which is a prompt for you to get all your Headbangers into a mosh pit Double Team, as in a few moments, a horde of charging Raptor Elk will come down the mountain. Move to one side, using the mosh pit to knock out any elk who comes too close.
Once the stampede has passed, continue up the mountain. It is fairly straightforward from here, as you will have more Punishing Parties (one group is on the ground instead of rocks), Hairbangers and another stampede, so use whatever methods you did before to kill them and reach the top of the mountain. When you do, you will receive a Brutal Victory and go to a cutscene.
Cutscene: The Kill Master is less than thrilled to have visitors, but once he learns they oppose Lionwhyte, he consents to help them. However, his bass strings - bass music being so soothing that it can heal wounds - are not heavy enough to restore Ophelia. The only strings capable of doing it are spun by the Metal Queen - but that spider is far less welcoming of visitors ...
Lair of the Metal Queen[]

Gameplay: Lita and Lars are still arguing, so you will be doing this mission alone. Head down the mountain (you can summon the Deuce now) and follow the road towards the spotlight. You will pass a Motor Forge as you go, and because the Metal Spiders you will face on this mission don't burn, you may want to stop here if you are using the Eternal Fire axe treatment and swap it for the Razor's Edge one.
As you approach the spotlight, you will see a Tab Slab nearby, which will teach you the Facemelter solo. This solo is a very quick and short riff that is extremely potent against groups of enemies, so pick it up and test it on the Hairbangers who spawn.
Once you are done, head over to the spotlight and talk to the bassist there for a quick cutscene where Eddie tries to make him care about the fact he is going into the Metal Queen's lair.
When you regain control, walk as far into the lair as you can until you are ambushed by metal spiders. These will close the distance with you by using a jumping attack, so block it and retaliate with your axe or guitar. Keep in mind that Metal Spiders can't burn, so don't bother with Fire Chords or other fire attacks.
Move on and you will be attacked by 3-4 swarms of tiny spiders. These will try to crawl onto you, but you can only reliably kill them with an Earthshaker. Wait for a group to start jumping on you, then perform one to kill them off.
Keep pressing forward and you will be attacked by another metal spider ambush and more mini spiders. Kill them all and move on, where you'll be attacked by a bigger ambush than the last, consisting of around 6-8 metal spiders. You will then find a path which leads you to the strings.
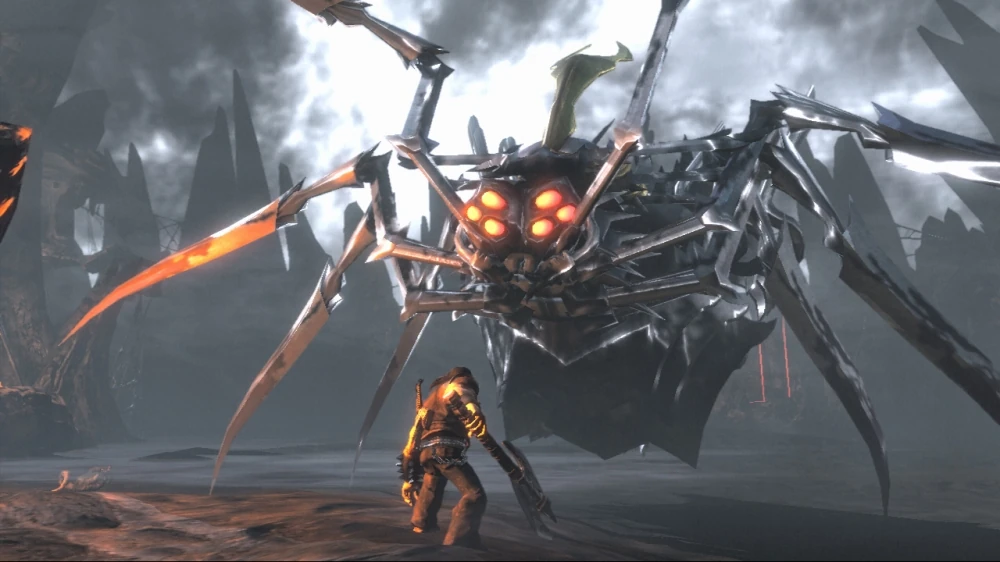
Before you can reach them, however, you will be approached by the Metal Spider Queen.
BOSS: Metal Queen[]
After a short cutscene, the queen will start following you. You cannot harm it head on, so you need to wait for it to get close, when it will do one of three things:
- It jumps back and spits a gob of chrome at you. Change the direction you are moving in (left to right or vice versa) when you see it spit to avoid it.
- It will draw back its front legs and try to slice you with a pincer cut. Move away to avoid it.
- It will stand up straighter and its eyes will turn red, exposing its engine. This is what you are waiting for, so hit it with a Shocker while it is powering up. If you take too long to do this, it will slam its body on the ground to try and hit you with a shockwave.
Once you have shocked it, it will fall to the ground, giving you the chance to attack it with your axe. Get in as many hits as you can until its eyes turn blue again and it gets up.
Once it does, it will move back to its web and summon metal spiders to attack you. Defeat these and the Queen will come back down again, spitting a gob of chrome at you when it does so.
This time around, it will jut out its spinnerets and eject a group of tiny spiders to chase you before it starts chasing you again. Kill them with an Earthshaker or just avoid them while you deal with the queen, who follows the same pattern as above.
Once you send it onto its web again, be cautious, as 4 metal spiders will attack, and soon after, 4 more will attack you. Once they are defeated, repeat the routine until you trigger a cutscene.
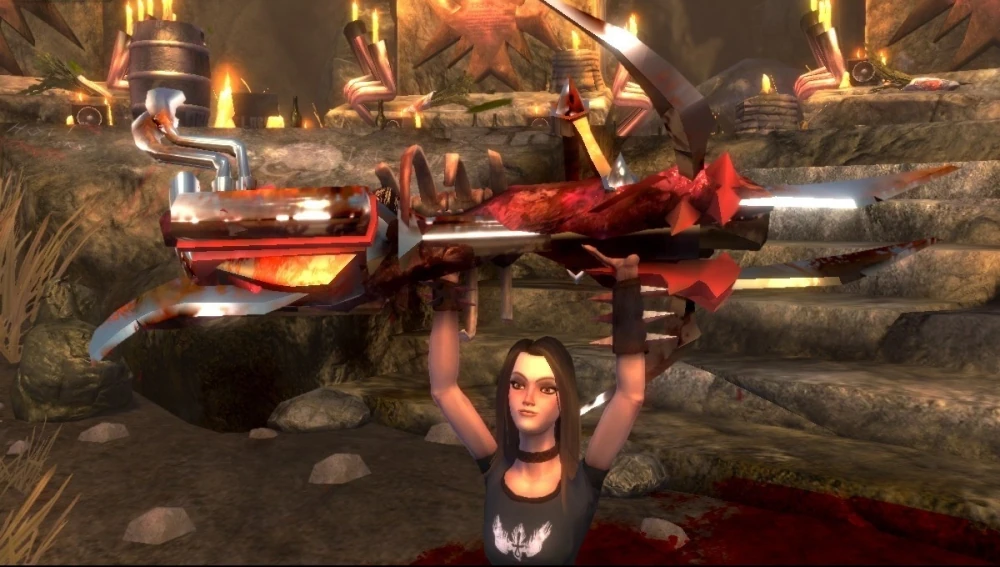
Cutscene: After the Metal Queen falls, Eddie builds an awesome trike (which ends up becoming the Thunderhog) to transport the strings back to the Kill Master. However, Ophelia hasn't got long to live, so he must get the strings to her fast!
Gameplay: You have 1m and 30sec to get the strings back up to the top of Tophat Mountain. Drive straight ahead and you will ramp out of the lair and be back on the road. Drive back to where you started Kill Master's Mercy and then drive all the way to the top before the time runs out for a Brutal Victory.
Cutscene: The Kill Master threads up the new bass strings and this time, the bass is sufficient to heal Ophelia of her injuries. Unfortunately for Eddie, she attributes this to Lars. Eddie then offers the Kill Master a place in Ironheade's army, which he accepts.
To the Slaughter[]
Cutscene: Once Eddie arrives back at Bladehenge, he sees that the Kill Master has modded the trike Eddie built to create the Thunderhog, a bass-emitting vehicle for him and his riders to use. When he drives away, Eddie sees Ophelia, and asks if she is going to tell him how she got hurt. Ophelia refuses to, as she believes Eddie won't let her go back and finish the job if she does. But Eddie says he loves watching her fight, so Ophelia tells him to meet her at the Razor Plains - and not to say anything to Lars about it.
Head on over to the spotlight and it will turn into another cutscene with the girls Ophelia was trying to save. She says she's trying to teach them how to fight using the carcass of the Razorfire Boar, as when you take out its metal bones, it can be turned into a ranged weapon.
Eddie realises that this is what nearly killed her last time, so he says he'll help her out and just in case, he'll keep the Kill Master nearby. Eddie jumps into the back of the Thunderhog once the Kill Master arrives and they set out to herd the boars for Ophelia.
Gameplay: This is a simple mission and actually more of a tutorial teaching you how to use the Thunderhog's Double Team attack. Unlike the other Double Teams you may have been using so far, the Thunderhog controls as a vehicle, so drive it around as you would the Deuce. The Boars will attempt to avoid you while you are in a vehicle, so drive around them and chase them back towards Ophelia. Once you have them trapped between you and the steps, use A to unleash a bass reverb that will stun anything (like the boars) near you. If you hit them successfully, you will see Ophelia run down the steps and gut one, removing its husk. Once the short (and amusing) cutscene finishes, stun any other boars who you still have trapped near the stairs for Ophelia. If you run out, go back out into the field and round up some more for her. Note that the Stun Note attack has a cooldown, so if you see that the Thunderhog's amps are sparking, you will have to wait until they stop before you can use it again.
Once you have helped Ophelia harvest a couple more boars, you will complete the mission and receive a Brutal Victory.
Cutscene: With the Razor Girls suitably supplied with carcasses, Ophelia tells Eddie to meet her back at Bladehenge for a weapons demo.
Battle for Bladehenge[]

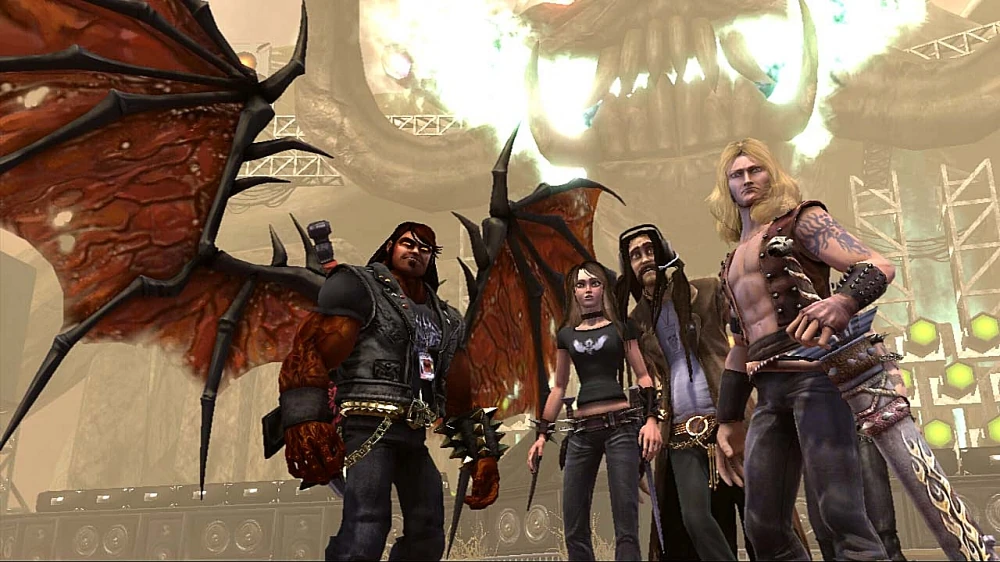
Cutscene: When Eddie returns to Bladehenge, it will turn into another cutscene where the Razor Girls try out their new weapons, and they work perfectly. They are welcomed into Bladehenge and ask when they attack, and just then, Mangus (a previously unseen ally) shouts "ATTACK!". They see what looks like searchlights on the horizon and this apparently means Lionwhyte's army is heading in their direction.
Lars declares that Ironheade will stand their ground at Bladehenge and have victory, but Lita doubts this is possible, as Bladehenge isn't well-fortified. Eddie then says he can build something and tells Lars to bring his best engineer and meet him in the northeast field, as he has an idea. However, Lars has no idea what an engineer is, so he brings Mangus along (Whom has no idea what an engineer is either).
You will regain control at this point, so make any preparations you wish and then talk to Lars and Mangus at the staging area for the upcoming battle.
When Eddie gets to the fields, he asks Lars the direction he thinks Lionwhyte's troops will attack from, and on getting the answer, states this is where they will build a Megastage to put on 'possibly the biggest rock show ever.'
Lars is confused, and Eddie explains that where he is from, a guitar only makes noise - here on the Brütal Land, its noise blows stuff up, so the sheer power and noise of a full-on stageshow may be more than enough to repel Lionwhyte's incoming forces. He then sends Mangus to grab some friends, and in record time, the stage is constructed.
STAGE BATTLE: vs the Hair Metal Militia at Bladehenge[]
Eddie and Mangus now go over the Megastage's lighting and pyro effects, all of which are good to go. As they do so, Eddie spots 'glowing people' spouting up out of the ground nearby.
Lita says that she's heard stories, and that the Titans were said to have summoned a force from deep within the ground with special rituals, and that they used this force to power their entire civilization. Eddie realises they are Fans and they are there for the show.
Mangus remarks that they look bored, but Eddie says he can "fix that."
You will regain control here and you will acquire the Fan Tribute solo. Make sure you are close to the Fan Geyser, where the Fans are coming from, and play the solo. The Fan Tribute is a fast solo with the notes fairly close together on the music sheet, so be ready to hit them a little faster than usual.
Playing the solo wins over the Fans, but Eddie says they will want merchandise as well as rock, and instructs Mangus to build a Merch Booth over the Fan Geyser to supply them with it.
Lionwhyte's men are then spotted on the approach, and Eddie tells everyone that it's showtime.
Gameplay: Before the battle starts, you will be instructed on how to use the recruit menu during a Stage Battle. Firstly, you must select some Headbangers. While they load (note the clock-like build timer on the unit's icon), move east to the second Fan Geyser and play the Fan Tribute to capture it. Then you have to build one unit of Razor Girls, and finally one Thunderhog. At this point, you can build two more units of your own choosing. Be aware that Thunderhogs do not stack their healing effect with each other, so you are probably better off recruiting two more units of Headbangers, Razor Girls, or one of each.
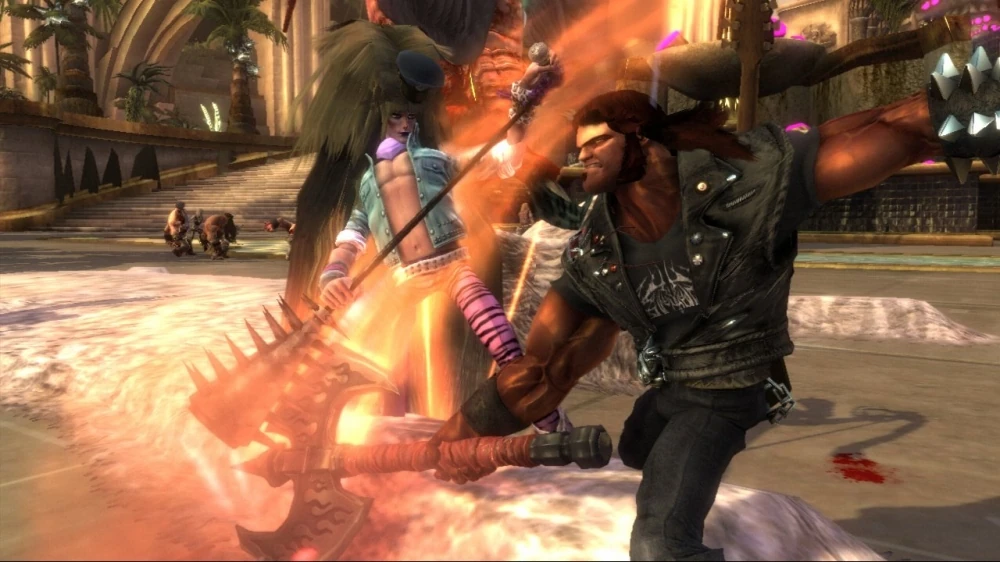
When you have chosen your units, a short cutscene will introduce Lionwhyte to you in person and then the Hair Metal Militia, glam metal duplicates of your own forces. These are the Hairbangers, Groupies (Razor Girl clones) and the horrific Glamhogs (Thunderhog clones). They will also be supported by Bouncers.
As they rush in to attack, try to send your units to run and take out the Groupies, who will be firing indiscriminately on you, while you handle the Hairbangers yourself. You can also use the Grabber move to pull distant Groupies over to you if you prefer not to run all the way to them.
Try to draw enemies into a group (or run into a group) and peel off your Facemelter. This solo will help you to quickly cut through swarms of basic enemies and injure bigger ones. Use and abuse it!
If you have time to stop, remember to buff your units with Battle Cry, as that will help them kill enemies quicker.
Keep a sharp eye on your Merc Booths as enemies that are not intercepted by you or your forces will attempt to destroy them, and if they manage to do so, they will go after your Megastage. However, you can rebuild your Merch Booth at the Fan Geyser once the enemies have been driven off (the Fans will be red if there are enemies contesting the Geyser and will become green once those enemies are destroyed or have moved away)
The Megastage is your lifeline in a Stage Battle. If it is destroyed, you will lose the battle, so if enemies are attacking it, kill them immediately. You can heal the stage by Double Teaming with it and pressing the Heal button but this will cost you 200 fans.
During a Stage Battle, you will be resurrected by Fans if you die. This rewards the enemy with 50 fans of their own, but the real problem is the time that your troops are without direction or guidance. Do your best to stay alive, but don't be afraid to risk your life now and then.
Remember to recruit fresh units as you need them, but mind their Load cost and the total Load your Megastage can currently support. If a large number of units are destroyed, be sure not to fill your Load back up with only combat units - leave enough room for at least one Thunderhog. If you make a mistake, you can cancel a unit that is still building by pressing X instead of A at the recruit menu.
As you are fighting off the enemies, Lionwhyte, who is the Avatar for the Hair Metal Militia, will probably attack you and your forces. Be sure to make him a priority target should he start shocking and using his area-of-effect scream attack on your troops. Be aware that your health can drop very quickly if he starts getting attacks off on you, so have units with you, or use a Double Team attack against him. Be extra vigilant of his tendency to Double Team with his Groupies and use their power attack to knock large chunks of health out of you and your forces. Counter it by Double Teaming with a Razor Girl and blasting the Groupie off his shoulders with a couple of power shots of your own. Use the Target Lock trigger to do this precisely.
You will also have the opportunity to Double Team with Lars here for the first time. He will stand on your shoulders and give a speech while you walk around; when you attack, he will use his sword to cut a fairly powerful arc of fire in front of you, damaging all enemies it hits.
Maintain your defense and kill all the enemies who attack and after a short while, it will go to a cutscene where Eddie kneels in pain, feeling like he's been shot in the back. There seems to be nothing there when Ophelia checks though, so Eddie returns to the fight.
You are then back in the battle. When you battle, take notice where the camera shows you they are attacking from, and if you know directions using time, then take note of that.
If you know your times in directions, then here are the directions:
- 1 - 11 o'clock
- 2 - 10 o'clock
- 3 - 11 o'clock
- 4 - 3 o'clock
- 5 - 11 o'clock
In all honesty though, you can probably disregard Mangus's directions and just observe where the camera pans to each time a new group of enemies shows up. The giant skull half-buried in the distance is easy to take bearings from, so your only concern is to make sure all your units are following you before you run over to intercept the enemies.
Defeat all five enemy rushes and you will win the Stage Battle and achieve Brutal Victory.
Cutscene: Clearly annoyed by Ironheade's perseverance, Lionwhyte promises Lars that he will regret starting this and retreats.
The troops cheer at their first victory and Lars gives a speech, declaring that they will now march for Lionwhyte's Pleasure Dome and bring the fight to where the General lives.
A short time later, Eddie finishes building Ironheade's Tour Bus and the army is ready to start their Tour of Destruction.
Tour of Destruction[]
This mission requires you to have purchased the Machine Gun primary weapon for the Deuce before you can proceed. Head over to the nearby Motor Forge and buy it if necessary.
Cutscene: After Eddie tells Mangus to get things underway, the Ironheade troops file onto the bus and the Tour is ready to begin. However, Tick Choppers are observing from nearby and move in to intercept the bus.
Gameplay: Your job here is to stay near the Tour Bus and destroy the attacking Tick Choppers with your machine guns (and your side flamers, if you purchased them as well). Tick Choppers that drive in front of the bus will be run over, so focus on the ones coming up on the sides and back.
Your machine guns will automatically target enemies that are directly in front of you, so get behind targets and hold down A to fire. If you can't see any in front of you, hold down X to light up your side flamers and you may torch a few Tick Choppers that try to pass you; switch to your machine guns if they get past. The Tick Choppers, for their part, will throw small Metal Ticks at the bus when they are close enough, and too many of these will destroy it, so you need to be quick in killing them. Be sure not to shoot the bus yourself!
From time to time, you may need to diverge off the road to chase Tick Choppers alongside paths or off jumps. Be aware of where the main road is going so you can get back to the bus quickly.
Once you reach the desert area at the end of the highway, the escort will be complete, giving you Brutal Victory.
Cutscene: Eddie glares at the remaining Tick Choppers milling about nearby and the small demons quickly take off. Meanwhile, Lars, Lita and Ophelia have gotten off the bus and are observing Battersmith, the large fortification barring the way forward. Eddie tells Mangus to unload the bus, as when he returns, it's going to be battle time.
Fists Shall Fall[]
Before you begin this mission, it is recommended that you pick up the Rally Army and Summon Flag solos from the Tab Slabs near Battersmith.
Cutscene: Eddie informs Mangus that 'the hour of rock is upon us' and without further ado, the Megastage is constructed.
STAGE BATTLE: vs the Hair Metal Milita at Battersmith[]
As before, the presence of the Megastage summons Fans from the nearby Fan Geysers - who in turn attract the Fan Leeches, large flying creatures who promptly fly down and clamp their mouths over the Fan Geysers, leeching out the Fans for themselves. This horrifies Ironheade's commanders and angers Eddie, but before they can act, Eddie falls to the ground, as again his back is in sudden pain.
This time, the source of the pain is revealed: as his friends watch helplessly, huge leathery wings emerge from Eddie's back. When he finally raises his head, his eyes have yellowed and his skin has turned a deep red - yet as he rises to his feet, Eddie flaps his wings and proclaims how great he feels.
At that moment, Bouncers pour from the gates of Battersmith and Eddie reassures them that despite how he looks, he's still the same Eddie as before and that they should take advantage of his new form for the coming battle. Lars agrees and Ironheade gets ready to meet the enemy attack. Although Ophelia is concerned for Eddie, Eddie brushes it off, saying that he always wanted wings.
Gameplay: At this point, you will be taught how to use your greatest tactical option during a Stage Battle: the ability to fly. Get used to moving and looking around and then you will be granted your final squad command: Move To Beacon. Using this allows you to send your units to the Beacon that you can now set by holding down the Left Bumper and moving the white spotlight around the battlefield.
Flying allows you to move around the battlefield much faster and also takes you out of range of melee attackers. You can also outrange ranged enemies easily by flying up and/or away from them. Flying gives you a wide view of a battlefield, letting you see where enemies are clustered, which allows you to swoop down and perform Facemelters, or any other attacks you like, before taking off again. You cannot attack in any way while flying, but you can recruit units and issue all your standard orders to your troops.
The first thing you must do however, is paint a target with the Beacon - in this case, a Fan Leech, so bring up the Beacon and place it over the closest Leech to your Megastage (the beam will snap to it and enlarge when you have it marked). Then order your team to move to the Beacon and once they get to it, they will attack and drive off the Fan Leech, freeing the Fan Geyser for you.
One thing to note here is that (at this point) you cannot effectively drive off Fan Leeches or attack enemy Merch Booths and buildings on your own. Either Double Team with an ally and use their Double Team attack, or send them in directly using the Beacon or Attack commands.
Your new Summon Flag and Rally Army solos will help you marshal your units more effectively. Playing the Summon Flag solo will create a flag that any new units you create will head to. You can pick it up and carry it around on your back so that units will automatically come to you when spawned, or you can use Y to set it at a specific point that new units will group up at. This saves you having to go back near the Stage and ordering new units to follow you.
The Summon Army solo will bring all your units on the field to your location. You can use it if you want to get them near an enemy position quickly or to pull back and defend a location, or just to regroup if they get scattered (which can happen in later Stage Battles).
Anyway, note that you will need to build your forces up (your load limit is 40 from now on), as you only begin with Lars, Lita and Ophelia. Set them on the Leech and as they move in, you will see a short cutscene where a Bouncer runs out and begins operating a mortar cannon. At the moment, you are still out of range, but you will need to take care of him, so using your flying ability, head to the top of the gate while your allies take care of the Fan Leech. Kill the Bouncer operating the mortar and fly back, as by then, the Fan Leech should be driven off and the Fan Geyser free for your Fan Tribute.
There are three other Leeches on the battlefield and by now, you may see that the Hair Metal Militia has driven off the one directly in front of the gate, claiming the Fan Geyser for themselves. They will usually try to go for the Leech on the far right next, so either intercept them, beat them there or go for the other one first, whichever you choose. Either way, your objective is to break down the gates to Battersmith, so whether you want to capture all the Fan Geysers first or just send squads directly to the gate is up to you. This is generally a simple Stage Battle, so experiment until you find an approach that you like.
Once you destroy the gates, you will win the Stage Battle and achieve Brutal Victory.
Cutscene: Furious at the Bouncers' failure to hold Battersmith, Lionwhyte fires them and retreats, leaving the poor oafs unemployed. Lars stops Eddie from attacking them further, seeing that they are no longer Ironheade's enemies, as they no longer work for Lionwhyte.
Eddie reverts to his human form and the group makes their way inside Battersmith, heading for the Cleave of the Impaler. Lars, who is taking point, moves ahead of the others and unwittingly activates one of the Impaler Towers guarding the way through. It fires at him, but with surprising swiftness, a Bouncer dives across and pushes Lars out of the way.
At that point, several stealthy figures walk out of the Cleave, carrying huge boxes on their backs. Although Lita suspects them of being Lionwhyte's men, Ophelia reveals that they work with her, smuggling Razor Girls out of the Pleasure Dome in their boxes.
The fact that they are good at hauling things, that they stay in the shadows, wear only black and are hard to see from a distance leads Eddie to conclude the men are Roadies. With 'some monster amps', Eddie states that they will be able to get the army through the Cleave and into Lionwhyte's Pleasure Dome. Ophelia mentions that a place called The Screaming Wall has amps like that, so Eddie instructs her and the Roadies to meet him there to collect some.
Pilgrimage of Screams[]

Cutscene: When he arrives, Eddie asks Ophelia what the two Bouncers are doing there. She replies that they only want to help now, so after cracking a joke about their hands, Eddie sets off down the trail, with Ophelia, the Bouncers and a squad of Ironheade troops in tow.
Gameplay: Head down the cliff trail. After you walk a little, you will see the impact of the wall, where it blows up a seagull just by its noise, and sends a shockwave powerful enough to open up molten lava, which a few Hairbangers blunder into, much to the amusement of your Headbangers.
Proceed a little further and you will encounter a group of Hairbangers and Groupies waiting for you. It is important to protect the Roadies during this mission, making sure they are fully healed (Double Team with the Thunderhog to speed this up) before moving on. If they are killed, you will fail the mission.
As you proceed, Lionwhyte will appear and try to tempt your Bouncers back into the Hair Metal Militia with the promise of new uniforms. They will refuse and he will fly off, so keep on walking. You will see further down the path are some Bouncer-like figures blocking the way. These are Glitter Fists, who are the Bouncers that opted to go back to the Militia and so have the new 'uniforms' Lionwhyte offered.
As you approach, the lava stream will break open like before, but this time, the enemies will jump over it and attack, so fight them off, paying special attention to the Glitter Fists who may try to target your Roadies.
Once they are defeated, the lava will harden and you can walk across. Keep walking and it will turn to a cutscene.
Cutscene: Eddie will get the Bouncers to form steps with their giant fists, allowing him to climb up to where the amps are embedded on the Wall. An explosion after he moves off-screen alarms Ophelia, but Eddie soon reappears, holding a pair of massive amps. In short order, the Roadies are outfitted with their new gear.
Gameplay: The Roadies are now able to defend themselves and you are also able to Double Team with them. This is necessary, as the winged microphone gulls will swoop in regularly to harass the Roadies, and can only be driven off via the feedback blast you can execute while Double Teaming with a Roadie.
Proceed back to the starting point of the trail, fighting off gulls whenever they come down to pester you. Once you get to the lava stream you last crossed, a large group of Glitter Fists will swarm down towards you, but don't worry, as the Double Team feedback blast of the Roadies is actually strong enough to knock them right off their feet. Keep knocking them over and your other forces will make fairly short work of them (killing them on foot is possible, but harder, as you still have to keep your Roadies alive).
Move on and you will be reinforced by a group of Razor Girls (you may be able to run up and get them if the Glitter Fists start causing trouble for you?). From there, simply keep moving back to the start, blasting away gulls when necessary and you will achieve Brutal Victory.
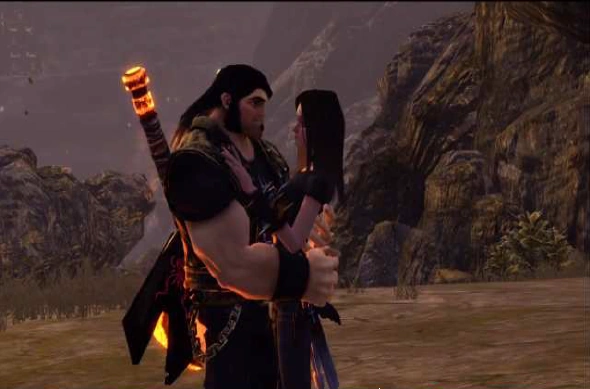
Cutscene: Eddie makes an offhand remark to Ophelia about not keeping her boyfriend Lars waiting, but she brushes it off. Eddie asks if she loves Lars and Ophelia marks off his qualities out loud. As she does so, Eddie interrupts her with a kiss, just as the Screaming Wall emits a feedback wave that blows their hair around dramatically.
Mangus honks the horn on the Tour Bus, and Eddie, still kissing Ophelia, waves him off.
March to Impalement[]
Gameplay: Talk to the Roadie and then the mission will begin.
This mission is a short one to reinforce the use of the Beacon and Move To Beacon squad commands, as well as the ability to issue orders to individual squads. You will also become familiar with the stealth ability of the Roadies.
First off, set the Beacon on the nearby Impaler Tower (the big tower with a skull on it) and then use the Move To Beacon Command to order the Roadies with you to bring it down. Here is where you notice that the Roadies' stealth allows them to move up unseen by the Impalers and destroy the tower without retaliation. This is true for all enemy units - Roadies will only be spotted by them if they get very close. In the event they are spotted or attack enemies, Roadies will become visible until the combat ends.
The next set of Impalers are not mounted on towers, but are fixed to the walls, so you must find and destroy the control station for them. Double Team with a Roadie and you will also become transparent, making you invisible to enemies as well. This allows you to pass by the wall-mounted Impalers without being detected.
Proceed forward and not far away, you will spot the control station, manned by two Hairbangers. Though you can walk up to the part of the barricade with a hole and jump off to kill them, an easier way is to simply go up the left side until the wall stops you going any further and use a feedback blast to shake off the chandelier above the control station, which will fall down and squash both Hairbangers. Before you do though, you can stay next to the wall and listen to a fairly long and hilarious conversation they are having about how to properly care for their hair.
In any case, once you kill them, the wall-mounted Impalers will deactivate, allowing your backup to move up and reinforce you. However, you need to keep them back for now, as there is one more Impaler Tower left up ahead.
To get rid of it safely, set your Beacon on it and then turn and face one of the Roadies. Hold down Y and they will start glowing blue. While you have them like this, any command you give will only be carried out by them. Be careful that you don't accidentally sweep over other units and turn them blue before you give the order, or else they will carry it out as well (and die, since the Impaler will see them coming). Despite what the game tells you, you can let go of Y before you give the order, as your units will keep glowing for a short time afterwards, allowing you look at the target you want to send them to. In this case, give the Move To Beacon command to order only your Roadies to move forward and destroy the Impaler Tower.
Watch them carefully, and once you see the tower come down, quickly recall them with a Follow command, as a swarm of Hair Metal Militia run down from beyond, accompanied by a Warfather. Kill them off and after some commentary, you will go to a cutscene and achieve Brutal Victory.
Cutscene: Eddie and Ophelia observe the banner hung for Ironheade by Lionwhyte, which depicts Lars as balding and potbellied. Ophelia wants to take it down, since she thinks it will break Lars's heart, but Lita walks past and asks if that's because Ophelia wants to break it herself.
Ophelia tells Eddie that everybody thinks she's a 'tear drinker', because her parents fought in the Black Tear Rebellion. If you haven't been keeping up with the Legends you can find in free roam, this refers to people who drank or bathed in cursed water from the Sea of Black Tears, which granted them strange powers, but also drove them insane and turned them into monsters.
Ophelia thinks that because of her heritage, people will try to turn Eddie against her. However, to prove they won't, Eddie gives her his mother's necklace, which his father gave to him, saying that he trusts it to her, no matter what.
All of a sudden, Lars exclaims, as he has just seen the banner. After looking at his own stomach, he proclaims that nobody will kill Lionwhyte but himself.
Sanctuary of Sin[]

Cutscene: Eddie tells Mangus to hurry up with the stage, as Lars is 'really mad'. Mangus yells at some people off-screen and the stage is constructed.
STAGE BATTLE: vs the Hair Metal Militia at the Pleasure Dome[]
After the Megastage is built, Lionwhyte appears and criticizes them for giving him so much trouble, as he is trying to show Doviculus that humans can be refined, beautiful and profitable. Lars counters him by saying that Lionwhyte has cheapened the heritage of metal. True metal is the music of a free people and doesn't sell out to make a profit. With that, Eddie yells a battle-cry and Ironheade charges into battle.
Gameplay: This Stage Battle is a test of the skills you've been taught leading up to this point. You start with Lars, Lita, Ophelia and a group of Headbangers. Your goal is to destroy Lionwhyte's Pleasure Tower (effectively his Megastage) at the top of the area.
The basic idea for this battle is to push forward, capturing all the Fan Geysers on the field, before using Roadies to take out either the Impaler Towers guarding the gates to Lionwhyte's Pleasure Tower, or the gates themselves. However you do it, bringing down the gates will win the Stage Battle for you.
The new element you will be introduced to here is the ability to upgrade both your Megastage and your first-tier units (Headbangers, Razor Girls and Thunderhogs). Upgrading your Stage allows you to generate the other units types you have acquired for your army, such as Bouncers and Roadies. You can upgrade the Stage multiple times, which will be necessary to access Bouncers or Roadies. Upgrading your first-tier units makes them more powerful and keeps them from becoming too obsolete when stronger units start appearing on the battlefield. To do this for either your Stage or your units, highlight them on the Recruit menu and press Y if you have enough Fans to upgrade. Upgrading your units requires you to fully upgrade your Stage first.
Keep an eye on your Load as you fight this battle. If you want to use units you can't yet recruit, you will need to save space for them, unless you have enough Fans in reserve that you can afford to throw units away on suicide runs to bring your Load back down.
Not long into the battle, you will get a radio message from Mangus, informing you that the Headbangers have built you something special (you may have seen them working on it before the mission). At this point, you will be granted the Headsplitter, which is a ranged attack vehicle that uses an Impaler head to shoot spears at enemies. You will need to upgrade the Stage to level 2 before you can access it, but it is very useful at providing ranged support for your forces. You can also Double Team with it, during which you can drive it around like the Deuce. Pressing A locks it in place and opens up the Impaler skull, after which you can target and shoot bolts with A.
Lionwhyte will at first send out mostly the same kind of troops you have been fighting already: Hairbangers, Groupies, Glamhogs and Glitter Fists. Occasionally, they will be supported by Warfathers. Depending on how aggressive or defensive you are and the speed at which you gain territory on him, he may either keep throwing the same initial units at you or he may start sending out his own versions of your Headsplitters and Roadies - the Hairsplitter and Watt-R-Boy. The latter in particular you may not even be aware of until they start attacking a Merch Booth, so keep an eye out for them.
In any case, take all the Fan Geysers on the field, then marshal your forces below the steps on the right of the Merch Booth you have directly below the Pleasure Tower. Plant your Rally Flag there, as you want to hold this position for the moment. Use an individual order (if you are flying, you will instead highlight the units you want with a pentagram symbol marked on the ground) to pull the Roadies away to the left and over to the steps on that side. You can also Double Team with one of the Roadies and the other two will follow you.
You have a basic tactical option here. You can either set the Beacon on the towers and have them destroyed so your main army can come up the steps and break down the gate (better to have two sets of Roadies for this, one for each Tower), or you can simply put your Roadies directly on the gate, since the Impalers cannot see them. Generally, Lionwhyte will send his forces down the right side to meet your army, so your Roadies should, with a bit of luck, avoid running into anything. However, Lionwhyte and his forces will sometimes react to the gate being attacked and move over there, which will get your Roadies found (and probably killed). The choice is yours, but regardless, if you keep at it, you will eventually triumph and receive Brutal Victory.
Cutscene: The Pleasure Tower starts crumbling down and the Hair Metal Militia run for their lives while Lionwhyte angrily tries to get them to regroup. A mirror is shaken loose and falls towards Lionwhyte, who tries to knock it away with his scream. Instead, the glass shatters and huge shards of it reflect Lionwhyte's look of dismay before they impale and kill him.
Lita believes they can finally live in peace, but Lars thinks otherwise, as now it'll be Doviculus' turn and that he will not let them live in peace.
It's Raining Death[]

Cutscene: Mangus explains they cannot pass as Lionwhyte's gate has been destroyed. Ophelia tells them that they could go around through the old aqueduct, but Lita winds her up, saying Ophelia would want that since it leads down to the Sea of Black Tears on the other side. Mangus warns them all that it's too dangerous because the hills are 'Fire Baron country', but when you accept the mission, Eddie tells him to take off his diaper, and do his job! And that's when you learn Mangus wears a diaper...
Lita expresses her doubts about continuing the campaign to Lars, but her brother reassures her that only good times lie ahead. As he says this, a shadow passes across them and they look up to see Emperor Doviculus hovering above.
The group quickly hides in a nearby fountain as Doviculus lands and looks around, calling out to Succoria. He asks why she lives among Ironheade, and that her mission was to spy on them, not join them. Lita, through instinct, believes Succoria is Ophelia.
Doviculus explains he could smell her blood at the Temple, just as he can now. He throws a dagger on the floor, which Eddie recognises as the one Ophelia stabbed through a Druid's hand back in the Temple of Ormagöden. Doviculus then asks for Succoria to help him wage war and not to live amongst humans another day.
This infuriates Lars, who jumps out of hiding and confronts Doviculus. Doviculus asks who he is, and Lars proudly states that the free humans have named him their king.
Doviculus then impales Lars using his glaive, and throws him to the floor, content that if Lars is the best of them, then he has little to be concerned about. Lita screams and rushes out, followed by the others, but Lars is swiftly bleeding to death. He asks Eddie to look after Lita, and then passes away.
Eddie tells them to get Lars onto the bus, then draws his axe as Ophelia draws her blades, ready to attack Doviculus. The Emperor is unconcerned though and doesn't even turn around as the two approach. He merely snaps his fingers and a huge Iron Maiden hits the ground in front of Eddie, knocking him down. The device bursts open, letting out a massive and deformed beast, the Bleeding Death.
As the Bleeding Death swings at them, Eddie tells Mangus to get everybody on the bus and that Ophelia and he will catch up. Eddie and Ophelia climb into the Deuce, and Eddie starts to drive.
Gameplay: Your objective here is to escape the Pleasure Dome before the horde of Bleeding Death, summoned by Doviculus, corner and kill you.
Although this mission is straightforward in that the path is fairly obvious (drive in whatever direction the falling debris makes you go), the Bleeding Death that are constantly being deployed from the Iron Maidens can sometimes get in your way. This can be deadly, as these monstrosities only need to hit your car two or three times to destroy it and kill you. As you might expect, you cannot bowl through them and they are far too durable for you to kill without being surrounded by a hundred more. Your only option is to drive fast and avoid them as best you can.
Keep in mind that you are trying to get to the aqueduct you see the Tour Bus drive through at the start of gameplay. After you have driven for a while, you will smash through a window and drop back down to the steps near the top of the Pleasure Dome. At this point, drive down and take a left turn and drive all the way to the steps leading down to the lower part of the Pleasure Dome. Drive towards the star-shaped entrance to the Cleave and as debris falls in front of it, turn slightly to the right, heading for the corner where the aqueduct is. When you reach it, you will be granted Brutal Victory and complete the mission.
Cutscene: Eddie and Ophelia keep driving, keen to put distance between them and the Bleeding Death behind them, but they soon run into Lita blocking the path. She tells Ophelia that Eddie can't protect her anymore and accuses her of telling Doviculus where they were and where they were heading. Ophelia asks why she would do that and Lita replies that Ophelia craves the Black Water of the Sea of Black Tears and would do anything to get it. They have a short fight, but Lita wins. Just as Lita is about to strike her down, Eddie stops her and tells her that he needs to talk to Ophelia.
Eddie and Ophelia talk, and Eddie asks her who Succoria is. Ophelia refuses to tell him, and Eddie asks what she is hiding from him. She tells him she is trying to protect him. Eddie asks if she was really protecting him, or protecting herself. She says she was doing it for Eddie, and Eddie asks if that was what she really doing, or if she was just leading them into a trap. Ophelia deflects, saying that she thought Eddie trusted her. Eddie says he did, until she kept secrets from him, secrets that got Lars killed. He turns his back on her, and Ophelia tears off Eddie's necklace, telling him he's just like the rest of them as she throws it at his back.
Eddie and Lita drive off, leaving a crushed Ophelia behind.
Doom's Dawn[]
Gameplay: This mission effectively starts as soon as you finish the previous one, as you cannot go back into the Pleasure Dome and there are no Motor Forges between your starting location and Death's Clutch.
Drive all the way along the road, listening to the dialogue between Eddie and Lita. You can jump out and grab the Bound Serpent, Buried Metal, and Landmark on your way there if you want. When you reach Death's Clutch, a cutscene will trigger.
Cutscene: Eddie and Lita run over to where the Kill Master is trying to revive Lars. But it is too late: not even the heaviest bass can coax a dead man back to life. Eddie puts his hand on Lita's shoulder as she cries for her dead brother...
Ironheade spend three months in Death's Clutch (possibly having lost their sense of purpose without the leadership of Lars). When the scene opens, the Megastage has been set up for a while now, and everybody is doing what they usually do. A Headbanger is by the river, watching a fish swim. He waves at it and then, like bobbing for an apple, dunks his head in the stream and grabs it with his teeth.
Coming up with his prize, the Headbanger looks up and spots a ghostly white figure with an umbrella on the other side of the stream. Uncertain, he waves at her.
In response, the figure moves towards him, humming a bridal march and as she gets closer, it becomes clear she is some sort of undead creature. The Headbanger tries to run, but the presence of the ghostly Bride prevents him from moving much faster than a crawl. Stopping to try and catch his breath, the Headbanger sees that a group of grim-looking goths are closing in on him, and he yells out Eddie's name to warn Ironheade.
Alerted, Eddie spots a bigger group of these goths, the Grave Diggers, advancing on their outpost, and calls Mangus to get the Megastage up and running.
STAGE BATTLE: vs the Drowning Doom at Death's Clutch[]
Gameplay: You start off this battle in combat with Lita and some other units. Beat off your attackers and then capture the two Fan Geysers nearby.
This battle is similar to the Stage Battle you fought at Bladehenge. There is no enemy Stage or structure to destroy - you just need to repel the rushes of this new enemy, the Drowning Doom. Their Avatar will not support them in this battle, so you will not have that aspect to worry about for now.
The Grave Diggers are the Doom's equivalent to Headbangers. Individually, they are weaker, but they come in groups of six, rather than four. Kill them in any way you see fit, but keep an eye on them as they will often go after your Thunderhogs and Razor Girls.
The Brides are support units for the other Doom forces. They will usually sit away from the fight, but close enough to slow you and all your forces down noticeably. If there is more than one of them around, this effect STACKS, so it is imperative that you kill them first, as you and your forces will be at a great disadvantage until you do. They do not directly attack you, but if you attack them at close range, lightning will strike you in retaliation. The best way to kill them is with a ranged Double Team from maximum distance, or by flying over them, dropping down and using a Facemelter next to them, as you will often hit some of the other units they are supporting as well.
You will also encounter tall, Medusa-like creatures called Frightwigs who act as lone ranged attackers for the Doom. Although there are only one or two of them in most waves, each has roughly twice the health of a single Razor Girl, so you may need to attack them with your combos, or use a Razor Girl Double Team to quickly shave off their hit points.
After a few waves, you will start seeing tall men with massive, bloated bellies accompanying the Grave Diggers and Brides. These are Ratguts and are short-range anti-infantry units that vomit out rats to swarm your forces. They can kill your infantry very quickly if not dealt with, so target and kill them off after you neutralize any Brides in an enemy rush.
It may get to where the waves are thinning your forces out faster than you are generating Fans to replace them, especially if you are trying to upgrade your Stage (either to get the Headsplitter, Roadies or Bouncer or to access your first-tier unit upgrades) at the same time. What you can do to help this situation is to build a Merch Booth at the far Fan Geyser (one of the early waves will get rid of the Fan Leech for you) but keep all your forces between your two starting Merch Booths. This third Merch Booth is a time-wasting device for enemies - when a wave passing by attacks it, leave your forces behind and fly down to the Merch Booth on your own. Harass the enemies there with Shockers and Pyros, then fly off whenever they turn around to attack you. Only the Frightwigs can retaliate while you are in the air and they are easily outranged. Once they turn their attention back to the Merch Booth, fly back and repeat. Once they destroy the Merch Booth, simply fly in when you can and play the Fan Tribute to rebuild it, as there is no enemy Avatar in this fight. If the enemies are still close enough, they may even turn around and come right back to try and attack it again.
Doing all these things lets you control the pacing of the battle and will buy time, allowing your supply of Fans to build up. The next wave of enemies only comes once the current wave is killed off, so depending on your ability to harass and distract the enemy waves as they approach, you can buy yourself enough time and Fans to upgrade your Stage and first-tier units within only a few waves. Practice your harassment tactics, as they will come in useful in later Stage Battles where you need to slow down the advance of enemy units.
Try to leave about 12 Load points free if possible, as once you have fought through a number of waves, a cutscene will trigger ...
Cutscene: Eddie, Lita and some Ironheade units will spot a massive group of Drowning Doom approaching from their flank. Prepared to fight to the bitter end, the groups steels themselves, but are interrupted by the sound of motorcycles from the Stage.
A group of bikers have appeared from somewhere and Mangus exclaims 'I told you they'd be back!', identifying them as Fire Barons. Revving their engines, their leader, The Baron, asks if Ironheade is the outfit that killed General Lionwhyte. When Eddie cautiously nods, the Baron orders his men to attack the advancing Doom forces.
Gameplay: You will automatically be granted a squad of Fire Barons. These are fast anti-infantry vehicle units, so they can make short work of Grave Diggers, Brides, Ratguts and Frightwigs if well-supported. Double Teaming with one allows you to hold down A to create a trail of fire behind you. Making a ring out of this trail will cause it to shrink and severely burn any enemies trapped inside it. They cost 6 Load to spawn, so if you have the room, you may want to bring out another squad to help.
For their part, the Drowning Doom have two new units in this last wave: the Organist and the Lightning Rod.
The Organist is a support vehicle that will decrease the attack power of you and your units if they are nearby. It does not attack, nor retaliate when you hit it as the Bride does, so destroy it after you kill other high-priority targets.
The Lightning Rod is a ranged vehicle, similar to the Headsplitter in function. It will lock down and start shooting lightning bolts at you and your units. These have the same effect as a Shocker, in that they will briefly stun your basic units when they are hit. This can be dangerous, so try to set a Bouncer on the Lightning Rod, or order your units to kill it off once you have their support units down. They have a decent amount of hit points, so it will take a while to destroy it if you attack it yourself.
In addition to these, you have plenty of other enemies to deal with. There is a smaller group that comes up from the river at the same time, so you will have to deal with being attacked from two directions.
Take out the support units first, then deal with the rest. Keep an eye on your Load and reinforce your units whenever you see your numbers dropping away. Use your Battle Cry whenever you have a moment and peel off the Facemelter whenever it is cooled down and you can see enemies bunched up.
Once you defeat all of the enemies, you will win the Stage Battle, achieving Brutal Victory.
Cutscene: Eddie, Lita, a Headbanger and a Razor Girl examine the body of a Grave Digger and Ophelia's falling raven crest on the shirt leaves no doubt as to who is behind the attack.
Lita states the Black Tears are the source of her power, but Eddie is confused, as the Sea of Black Tears was supposed to have been sealed up (again, this is covered in the Legends you find in free roam). The Baron then explains that Doviculus reopened the way to the Sea after Lionwhyte was defeated.
Eddie concludes that Doviculus is trying to set humans against each other again, hoping the uprising will destroy itself, as it did during the Black Tear Rebellion. He decides that Ironheade will not run, but instead head for the Sea of Black Tears, despite Lita's protests. The Baron decides to join Ironheade formally at this point.
A short time later, Eddie is in the Deuce and says he wants to do a little recon of the land to try and find a way to get the Tour Bus over a nearby gorge.
The Unhealing Wound[]

Gameplay: This is not really a mission, but there is a bit you have to do before the next real mission starts.
You will be able to access a Motor Forge near Death's Clutch, so buy anything you want before driving on.
Follow the path all the way down until you see a bridge. Although it has fallen away in the center, drive forward to the edge, as there are Devil Thorns growing there. Jump out and play the Relic Raiser to begin a cutscene.
Cutscene: Eddie comments on the craftsmanship of the bridge as Mangus drives the Tour Bus down to meet him. Mangus then points out that people are using it already, causing Eddie to look ahead and narrow his eyes at what is approaching from the other side.
A vehicle, looking much like a funeral car, is driving to meet Eddie. Behind the wheel is a familiar face.
Ophelia is back, quite literally with a vengeance.
She pulls up and gets out to face Eddie, unfamiliar now in her asphyxiated blue skin, dark, running eyeliner and the Black Tears wrapping around her as clothing. She remarks on how she finally has her own car, the Hearse. Eddie questions her on what she's done and Ophelia answers that after they left her for dead, she was depressed, but soon got over it and started making new friends.
Eddie tells her Doviculus is not her friend, but Ophelia ignores him as she continues, telling him how much Eddie has taught her - in particular, how to use the power of music.
Using the power of the Black Tears, Ophelia conjures up her guitar, the Six-Stringed Sorrow and begins playing (ostensibly the background song, "Betrayal" by Lita Ford). Her music reverses the effect of Eddie's Relic Raiser and the bridge starts falling apart underneath Eddie.
Ordering Mangus to back up, Eddie jumps into the Deuce and reverses, only just managing to get back to solid ground before the middle of the bridge crumbles back into the gorge below. Satisfied, Ophelia gets back into her Hearse and drives away into the jungle on the other side.
Mangus makes a less than sincere expression of regret at not being able to drive to his death at the Sea of Black Tears, but Eddie stops him, saying that he can fix the bridge, but he'll need 'about 5000 cubic buttloads of scaffolding'. However, he only knows one place to get that - Bladehenge, which is stated by Lita as she jumps into the Deuce.
Gameplay: Lita will join you for the drive back. You can speak to your other units around the Tour Bus if you want, but they only say 'Hurry!', apart from the Baron and the Kill Master.
Drive up the hill leading to the back of Lionwhyte's Pleasure Dome and you will see a way through. You will end up in the ruins of the Pleasure Dome; fortunately, there are no Bleeding Death here anymore, but the sky above is an ominous red.
Drive down to where the entrance to the Cleave is and drive through. When you emerge into Battersmith on the other side, you will see that this part of the continent is now under the Tainted Coil's control. The sky is a constant red and a lot of Coil patrols now roam the countryside.
Drive to Bladehenge and you will see quite a few Coil units patrolling outside. Get close enough and a cutscene will start.
Cutscene: Bladehenge has been taken by the Tainted Coil, made clear by the S&M straps around the giant sword in the middle of the area. Although Lita wants to drive them out straight away, Eddie stops her, saying they will come back once they've dealt with Ophelia.
They drive a short distance from Bladehenge to where the scaffolding is. Lita jumps out and runs over to it, from where you can begin the next proper mission.
Deliver the Metal[]
Cutscene: Eddie confirms to Lita that this is the scaffolding they need, so Mangus drives the Tour Bus over to them so it can be loaded on.
After they do so, Mangus urges them to get moving before they are spotted. Unfortunately, some Tick Choppers nearby have seen them and raise the alarm, so Eddie orders everyone onto the bus.
Gameplay: This is much like the earlier Tour of Destruction mission, where you escorted the Tour Bus from Bladehenge to Battersmith. This time, you have to protect the Tour Bus on its way back to the bridge. It will drive back the same way you came, until it gets to the Pleasure Dome, at which point it will go around through the aqueduct and along the road up into Death's Clutch, then down the other side to the bridge.
Use the same methods as before to take out the Tick Choppers. The Bolt Thrower and Heat Seeker weapons destroy them with ease and this is one of the few times the Mine Dropper may come in useful.
You will not have to divert from the road as often during this escort mission, but there are a lot more Tick Choppers attacking the bus this time, especially as you get to Death's Clutch. Once you get down to the bridge, your forces will help kill off any Tick Choppers still chasing you, so follow the bus onto the bridge and you will start a cutscene, achieving Brutal Victory.
Cutscene: Eddie and the Tour Bus come to a halt, distracting two Tick Choppers who fly past them and, too late, see the end of the bridge. The demons fly over the edge and plummet into the gorge.
Wasting no more time, the broken section of bridge is repaired, much like the construction of a Megastage or Merch Booth. The Tour Bus is then able to cross the gorge, followed by Eddie in the Deuce and the Baron on his motorcycle.
As they cross, Eddie remarks that although he loves the pyros, they're supposed to be surprising Ophelia with this move. Mangus fobs him off, telling him to chill out, as they've made it across the gorge. They are both interrupted by a roar from the jungle; when Eddie asks what it was, the Baron tells him he doesn't want to know.
A Number of the Beasts[]
Cutscene: Ironheade's intrusion into the jungle seems to have riled up some of its inhabitants, as a pack of large saber-toothed animals glares at them.
Looking at them, Eddie gets an idea and while the Baron thinks of ways to kill them, Eddie reveals he wants to bring them into Ironheade's army.
A short time later, Eddie, Lita, Mangus and the Baron have gathered to discuss the plan. Eddie will Double Team with the Baron and trap the beasts in a ring of fire, after which Lita will jump down on them and ride them into a cage Mangus will build. The Baron asks what they will do after that, but Eddie stops him, saying that he can't tell them the whole plan, as he hasn't thought that far ahead is holding it back for their own protection, in case they are captured.
The Baron looks unconvinced, but Eddie urges him on and after the cage is constructed, the mission begins.
Gameplay: Your goal here is to lure the Metal Beasts over to the lit area in front of the cage, then trap them in a ring of fire using the Double Team move. This can be awkward, as the Metal Beasts will sometimes run through the fire you have put down, injuring themselves and forcing you to try again. All the while, they will be constantly breathing fire on you, which does not do a lot of damage when you are on a vehicle, but can mount up, as you can't regenerate.
There are three Metal Beasts out in the jungle sleeping, so drive out and look for them. They will not react to you until you touch them, so drive into one and then lead it back to the lit area. You can make this easier on yourself by turning around and backing into one, then accelerating away when you see it get up.
When you manage to trap one in the lit area, Lita will jump down and daze it, then herd it into the cage. Do this three times and a cutscene will start.
Cutscene: Eddie is pleased with their progress, saying he knew they could be ridden. Lita tells him that she wasn't riding them so much as hanging on for her life and that there isn't really any way to ride the creatures.
The Baron corrects her, saying that the Zaulia do it all the time. When Eddie asks who the Zaulia are, the Baron explains the Zaulia are the companions of the Metal Beasts ... and their guardians, he adds, as spear points surround the trio.
The spears belong to none other than the Zaulia themselves, amazon-like women with painted faces. Their leader, Rima, steps forward as the scene cuts.
When the scene returns, Eddie, Lita and the Baron are now imprisoned in a cage themselves. Eddie has just finished explaining himself to Rima and states he's here to recruit her for his army.
In response, Rima gestures and a Metal Beast ignites the torches at the front of the cage. As the fire advances toward the captives, Rima states that the Zaulia are already an army, one that Eddie is not welcome to join.
Gameplay: The fire at the front of the cage will constantly advance on you. However, all you need to do to escape is to run to the back of the cage and look behind the structure to see the Devil Thorns growing there. Play the Relic Raiser there and a cutscene will start, after which you will be awarded Brutal Victory.
Cutscene: The Relic Raiser puts out the fire and raises up an ancient drum kit, along with a mural depicting a bearded man who resembles Eddie.
Rima steps forward to examine it, then asks Eddie if it is him. Eddie says it isn't - it's his father. He glances at Lita, who says he's a famous warrior who led the Black Tear Rebellion; his name was Riggnarok.
Rima adds that Riggnarok fought with the Zaulia against the Tear Drinkers and gave them the skills to defend themselves. Eddie then explains that his belt buckle also came from Riggnarok, as he found it in the attic after he died. He says that somehow, his father fought alongside the Zaulia during the last Black Tear Rebellion - so now, he asks if they will fight alongside him, a proposal that Rima readily accepts now that she knows he is the son of Riggnarok.
Regret's Infinite Mire[]
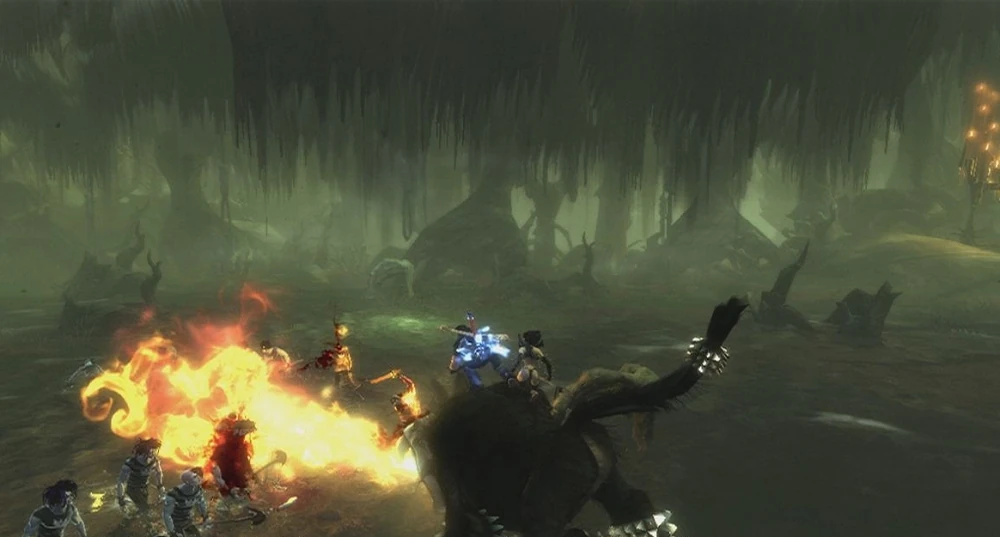
Cutscene: Before leaving, Eddie learns that Riggnarok was a hero, the only one to resist the temptation of the Black Tears. He left to do one final mission, which was to assassinate the emperor of the demons and was never seen again. Eddie believes that Doviculus opened the Sea of Black Tears before to destroy his father's army, just like he has done now. Lita thinks that maybe Eddie could have been sent to the age of metal to finish his father's mission. Eddie says that it's no longer his fathers mission anymore - it's his.
Gameplay: This is basically an escort mission, as your task is to guide the Tour Bus through the swamp and protect it from attackers. Unlike the others, you will not use the Deuce (and you cannot summon it either). This time, you will be relying on Rima and her Metal Beast and your own combat skills to protect the bus. You will also be supported by the Kill Master, who rides behind the bus for the trip.
Your new Metal Beast units are very good at destroying infantry, especially melee units like Grave Diggers. When you are Double Teamed with one, hold down A to breath out a constant stream of fire in front of you. If they are left to their own devices, Metal Beasts will breath their fire from side to side to hit as many targets in front of them as they can, but will pause between breaths.
During this mission, you can make use of your Call of the Wild solo to summon help if you need it. Because you cannot give unit commands during this mission, the animals will not follow you between encounters unless you are riding one of them.
Stay ahead of the bus as it drives down into the swamp and eventually, a large group of Grave Diggers will rise out of the water in front of you. If you choose to stay on Rima's Metal Beast to kill them, sweep your fire breath from left to right across all of the enemies in front of you, then run off when they come close. Turn around and repeat once you get enough distance. It should not take more than a few of these to kill them, but if you need to heal yourself, run back behind the bus to the Kill Master. Be aware that if any are alive when you do this, they will go after the bus while you are healing, so try to do it between attacks rather than during.
Move on and you will run into a roadblock. You will need to head off down the side path to try and find a way around to the other side, where you can destroy the roadblock.
As you head down, take note of the Laser Panthers than run off ahead of you. Soon, you will run into a group of Grave Diggers, while two Laser Panthers will run in behind them to attack. Kill them and move forward to encounter another group of Grave Diggers and a Laser Panther up in a tree. Kill the Grave Diggers and use Shockers to kill the Laser Panther off.
If you are riding the Metal Beast at this point, dismount, as up ahead are a new Drowning Doom unit - the Brood. Despite their small size, these baby carriages are considered vehicles and they can move very quickly when they want to. They attack by flinging piranha-like dolls out of the carriage at enemies. These dolls chew on enemies they land on, doing significant damage to vehicles in particular.
Use your guitar and axe attacks to destroy the Brood you encounter, then attack or burn the rope nearby to drop a guillotine through the roadblock, destroying it.
Stay ahead of the bus and follow the path forward. Kill the Laser Panthers at the foot of the bridge, then head over it to take out the Bride and Brood on the other side. One thing to note is that with the Metal Beast, you can attack Brides without fear of retaliation - their fire does not trigger the Bride's lightning for some reason.
Once you kill the Brood, the bus will start moving again, swinging left once it crosses the bridge. Move up ahead of it to intercept the Frightwigs and other enemies attempting one final roadblock. Once you have defeated them, burn or cut the rope nearby to destroy the final roadblock.
Once this is done, follow the bus as it heads down into the Dry Ice Mines. When you reach the bottom, the mission will be complete, awarding you Brutal Victory.
Cutscene: Eddie comments on the foggy environment, saying it could be good for their show. Lita asks if he means from a defensive standpoint, to which Eddie says 'Yeah, that too'.
Dry Ice, Wet Graves[]

It's recommended that you drive around the new area first and pick up the remaining solos - Rock Block, Light of Dawn, Anvil of Burden and Bring It On Home. They will be of great use in the upcoming Stage Battle. Talk to Lita in the Dry Ice Mines when you're ready.
Cutscene: Ophelia appears behind Lita and Eddie and Eddie asks what happened to her.
An Organist drives up and Eddie braces for combat, but Ophelia tells him not to worry as this song 'only hurts me'.
The Organist begins playing Ozzy Osbourne's "Mr. Crowley" and the scene shifts back in time. Ophelia, depressed and alone, wanders toward the Sea of Black Tears, hidden under a mountain. Inside, a vast, cathedral-like cavern houses the Sea and is spanned by a single bridge. Stepping up onto the railing of the bridge, she then jumps off into the Sea. Underwater, she opens her eyes, but before she can do anything, black tendrils reach out of the depths and pull her down into darkness.
Above water, the Sea boils as something begins rising from the depths on a fountain of black water. The blue figure of Drowned Ophelia, created from Ophelia's anger and misery, emerges and opens its eyes.
The scene cuts back to the present and now both Ophelia and the Organist have disappeared. However, far across on the other side of the mine, a Megastage has been constructed and its dark, foreboding appearance leaves no doubt as to whose vengeance its Fans now fuel.
STAGE BATTLE: vs the Drowning Doom at the Dry Ice Mines[]
This Stage Battle is the first you will fight against a proper enemy Megastage. You will need all your forces on hand to bring it down, as it will be heavily defended in most cases.
Ophelia herself will now support Doom units during the battle. The first thing you will notice is that unlike Lionwhyte, she will almost exclusively use her solos to attack you and your troops, especially her Silence solo. This renders you unable to play solos of your own, issue unit commands or use your guitar attacks.
You will also begin to encounter her Reapers. This is a fast anti-infantry unit that is also quite dangerous to you if you stay on the ground. They ride around very quickly, slashing at targets with their scythe. Hitting them with melee attacks is difficult, enough that you are better off using Shockers or Double Team attacks to take them out. Fortunately, they are not all that durable, so focused fire will take them out fairly quickly.
For your part, if you picked up the Rock Block, Anvil of Burden, Light of Dawn and Bring It On Home solos, you will have your own new set of abilities to counter Ophelia with.
Rock Block will crowd up her Stage with a bunch of Stonehenge-style rocks, halting Ophelia's ability to create units. Use it after you destroy a lot of her units and are in a position to rush her Stage. She will have to rely on her Stage defenses and any units she already has on the battlefield. You can also use it whenever you feel like you need time to build up Fans or units between skirmishes with her forces.
Anvil of Burden will put an anvil on her leg that brings her down to the ground, preventing her from flying. Use it whenever you have her at a distance from her units to keep her from helping them. Can sometimes be good at keeping her away from the Stage when you are getting ready to attack it, if you catch her elsewhere.
Light of Dawn is a very long solo with quite a few notes to hit and it has a long cooldown as well. This is because when you pull it off, all debuffs affecting you and your units will be removed, and all buffs affecting the enemy will be negated as well. The debuff-removing effect in particular cripples the Doom's Bride, Organist and Dirgible (which you will meet later) units.
Bring It On Home is your final, and most potent solo. Like Light of Dawn, it is long with a lot of notes, but when you pull it off, it summons a giant flaming zeppelin that smashes into the ground around you, doing a lot of damage to any enemy units in the area. Play it to help out your forces during a skirmish or when the Doom seems to be getting the upper hand and it will probably turn the tables if it lands directly on them. It also makes the Ambush secondary missions much easier.
For the battle itself, you will have a choice of moving your forces up either the left or right paths to reach the Doom's Megastage. Ophelia will normally start by sending basic units down both sides and attempting to build her Well of Souls (her version of a Merc Booth) on both, before sending both groups down to attack your Stage and distract you while she builds up her forces. After this, she will almost always concentrate her troops on the right side and send them at you from that direction, so build up your forces and meet them there.
Because it is difficult to get from one side to another quickly (you cannot fly over the middle part of terrain separating them), you can optionally leave the left side Fan Geyser to Ophelia and hold the right one alone. If you are fine with some micromanagement though, you can send units up that way to bring down her Well of Souls and fly over to cap it with a Merch Booth. Be aware that doing this will often result in her sending units to retake it, in which she will support - afterwards, those units will normally continue down to your Stage to attack it. You will need to leave units to defend either the Merch Booth, or your Stage if you decide to take the left Geyser.
Set up your units near the right Merch Booth and build up your army strength, repelling Ophelia's battlegroups as necessary. Use your Light of Dawn to render her Brides and Organists impotent if you see a large group approaching before you meet them. Resupply your army with new units as needed and use distraction tactics as mentioned in Doom's Dawn if you need time to generate fans - but keep in mind that you will have a lot more ranged units who can attack you this time around.
Once you are satisfied with your army strength, advance on Ophelia's Stage. Be aware that Ophelia frequently keeps a rear guard on hand near her Stage, in the event that you destroy her main force and try to rush her Stage before she can generate more. This will often be a group of Reapers who can cut down your forces quite dramatically if they are all trying to attack the stage (as none of them will target the Reapers). On top of that, Ophelia will use the Megastage's defenses and her own solos to fight you off, so before you commit to your stage rush, try and draw out her defenders and kill them first. Use a Light of Dawn to quash any attempts at Silence or other debuffs and follow it up with your Rock Block before rushing your troops in. You can also use a group of Roadies to bring it down while your other units support and run interference for them, but be aware that enemy units coming off her Stage have a good chance of landing close enough to spot them.
However, if the battle seems to be turning against you in spite of everything, fall back and use your Rally Army to pull your remaining forces back to your Merch Booth or other rally point. Ophelia can be quite challenging, especially on Brutal difficulty, so never be too proud to retreat when necessary. Fighting off your attacks will cost her resources, so regroup, replenish and keep attacking her and you will eventually bring her Stage down, granting you Brutal Victory.
Cutscene: Ophelia seems to have escaped, but Eddie has noticed a rock grinder nearby, giving him an idea for a 'second stage'. This becomes the Rock Crusher, Ironheade's super-unit.
Racing the Reaper[]
Cutscene: Eddie asks Mangus offhandedly if he's ready to get underway and possibly die, which freaks Mangus out. Eddie tells Mangus he was trying to get Mangus in the mood ... for death.
Gameplay: This is the final escort mission of the game. You need to get the Tour Bus down to the Sea of Black Tears (which has been heavily defended in free roam, up to now). You will actually have a few friendly units riding shotgun with the Tour Bus, though the Headsplitters can't attack while moving, so the defence work is still down to you. Unlike before, there are no Tick Choppers attacking the bus - rather, Ophelia's Reaper units will try to get alongside it and chop it apart with their scythes.
The Bolt Thrower and Heat Seeker weapons work as well on the Reapers as they do on Tick Choppers. The Mine Dropper is still useful or if you prefer, the Sub-Woofer can be effective if you see Reapers come up alongside you.
As always, stay with the bus and kill the enemies as quickly as possible. Partway through, a large black air-balloon - the Dirgible - will join in and attempt to bomb the Tour Bus with ash urns. You can attack it if you have the Heat Seekers (though whether you can actually bring it down is unknown), but the Reapers are still your primary target, so deal with them first.
When you reach the skull mouth leading down to the Sea, the escort will be complete, but you are not done with the mission yet.
Cutscene: The way forward is blocked by a large group of Drowning Doom units. The Dirgible that has been harassing the Tour Bus comes down and lets Ophelia off. Ophelia then stretches out her arms and the Doom surge forward to attack.
Gameplay: You will have your own units here who will run forward to engage the Drowning Doom units coming at you. Ophelia herself will attempt to single you out, but she still prefers to use her solos against you, rather than attack you directly. Be aware that this is not a Stage Battle, so you can't fly and there are no Fans to resurrect you if you die. Focus on helping your units kill off the enemies (remember that Double Teaming lets you hide from damage, forcing enemies to kill the unit before they can attack you) and then deal with Ophelia if necessary. Once you do so, the mission will be complete, giving you Brutal Victory.
Cutscene: With Ophelia beaten down to the ground and her units defeated, Eddie informs her that this is known as 'getting served'. Ophelia replies that Eddie isn't the only time-traveller in the Brutal Earth's history - the Tainted Coil sent their own Emperor into the future to recover the secrets of the Titans. Eddie remarks that it was probably to avoid getting killed by Riggnarok, but Ophelia states that Riggnarok went with the Emperor. She then manages to get to her feet and takes flight, saying she'll be waiting for Eddie 'in the deep end'.
Sea of Black Tears[]

Prior to completing this mission, whenever you enter the cavern housing the Sea, you will hear Ophelia's voice reciting a poem about how she came there. If you listen to the poem, you will notice that Ophelia refers to herself as if she is the Sea - this is the first strong hint you get that the Ophelia you have been fighting is a manifestation of the Sea's power, rather than Ophelia herself.
Cutscene: Mangus observes (correctly) that the Sea of Black Tears is more of a lake.
Lita muses on what it means if Riggnarok went forward in time with the Emperor, but Eddie brushes it off, saying that there aren't any demonic overlords walking around in the future ... apart from at record companies. Lita questions him on whether it's a good idea for him to keep fighting Ophelia and Eddie affirms her, telling her to get set up for 'one last show'.
Lita consents, and then talks about how much Eddie has done for Ironheade and humans and that Lars always said Eddie would lead them all to a better life. She remarks that Eddie never seems to any credit for his work or even time to rest, but when she turns to question him further, she sees that Eddie has fallen asleep against the side of the Tour Bus. She leaves him to his rest, saying that she'll handle the rest of the battle preparations herself.
The scene switches to a dream Eddie is having, as "Holiday" by the Scorpions starts playing. He is lying on a hill with the old Ophelia, just holding her and kissing. Then the music swells and they run along a beach hand-in-hand, killing a couple of Druids as they go. They kiss again and Eddie hooks up his mother's necklace with his finger, still around Ophelia's neck.
Abruptly the scene switches back; Eddie opens his eyes and takes on his demon form, ready for battle as the music transitions into "So Frail" by Mirrorthrone.
STAGE BATTLE: vs the Drowning Doom at the Sea of Black Tears[]
This is the final battle against the Drowning Doom. You will have to break through two instanced lines of defenders, plus the two energy towers that act much like Lionwhyte's Impalers, except that they will instantly destroy anything that comes within the energy spheres they constantly emit.
Before you can get near Ophelia's Stage, you should capture the four Fan Geysers on your side of the bridge. While you are doing this, Ophelia will send small squads of Drowning Doom at you (the Doom can pass by the energy towers unharmed) to try and slow you down. These will start off composed of Grave Diggers and Brides. Later, Ratguts will begin accompanying them and after that, Reapers and possibly Brood carriages. Rally your forces near where the bridge meets land and repel these attacks.
Once you have all the Geysers, begin building up your army at your bridge rally point. Make sure you have every unit you want and all the upgrades you need, plus a healthy supply of Fans in reserve before you head onto the bridge, as once you start attacking and breaking through her defensive lines, Ophelia will start trying to attack you with solos much more frequently. Be careful especially of her Silence, which can ruin you if she plays it just when you are sending your units in and intend to buff them or shut down the Doom's debuffs.
The first line is a group of mostly infantry units backed up with a Dirgible. This is the Doom's tier III debuff vehicle and it has an immense reserve of hitpoints. However, you are able to build your own uber unit now that can take it out relatively easily - the Rock Crusher.
The Rock Crusher needs you to have your Stage fully upgraded, but once you do and have got it on the field, it is immensely powerful. Smaller infantry and vehicles you can destroy simply by driving into them, as it has a large grinder on its front that chews up anything it touches (bar friendly units). Larger units and even the Stage can also be brought down with the grinder, but it takes a while.
It also has several pyro-mortars that fire automatically at nearby enemy targets. These are completely automated, so all you have to do is be in range of an enemy and they will start firing.
As if that wasn't enough, the Rock Crusher plays your Stage music, buffing all your units near it with a Battle Cry effect.
But by far the most impressive ability of the Rock Crusher is its Double Team attack - you will play the Bladehenge solo, which creates a target marker on the ground. Move the target over an enemy or group you want to attack and press A; a fiery Stonehenge circle will surround the target area and a massive sword will fall from the sky, impaling those within. An explosion powerful enough to blow apart both the circle and sword ends the attack, which either destroys or severely injures anything else caught inside.
Create a Rock Crusher and have your other units hang back while you drive it up onto the bridge. You can use the Bladehenge solo from some distance away, so get as close as necessary to catch the whole Doom group inside one target marker. Once you use it on them, they will start to advance, so back up and keep throwing Bladehenge solos at them until they are all destroyed.
When they fall, Ophelia will start using her solos against you with much greater frequency. Drive her off, spawn a new Rock Crusher if you lost the first and move forward to the towers.
Drive the Rock Crusher up close enough that you can use the Bladehenge solo to destroy one of the towers. At this point, you can fly around to Ophelia's side of the bridge and harass or kill any units she has waiting in reserve if you wish. You MAY also be able to pre-empt the second instanced group of defenders by summoning your army directly to Ophelia's side of the bridge with Rally Army. This is untested by this editor, however - at the very least, the remaining energy tower means that you have make any reinforcements rally somewhere beyond it until they can be summoned in by you. The big advantage should be that if your army goes down, the large group headed by the Tree Back should remain on Ophelia's side, if it spawns at all (since you haven't 'activated' them by destroying both towers yet).
The traditional way of doing things though is to rally the strongest army you can and then destroy the second energy tower with the Rock Crusher. When you do this, a large group of Drowning Doom, headed by their uber unit, the Tree Back, will rush you and your forces.
The Tree Back may not look like much, being nothing more than a tree full of crows that moves around, but it is extremely potent, as the crows do constant damage to units that get too close to it. Add to this the other units accompanying it and the possibility of Ophelia attacking at the same time, and this is a potential curb-stomp battle on you if you are playing Brutal difficulty.
So how can you defeat it? To start with, turn your Rock Crusher around, so you are facing back towards your Stage. The Bladehenge solo target reticule can be aimed behind you, so you can hit targets and then accelerate to get away once you can move again. Do this before you destroy the second tower, then reverse until you can catch the Tree Back and anything else with the Bladehenge attack. You may take damage from the Tree Back's crows depending on its distance, but if you are lucky, you can avoid that and then accelerate away while the attack is recharging. Get back into range by reversing and then hit the Tree Back's group again. Keep using these hit and run tactics and you should severely damage, if not kill the Tree Back and some of the others. Once your Rock Crusher is destroyed, or you run out of bridge, it's down to you, your solos and your remaining units to stop the Tree Back's group if it is still coming. Spawn another Rock Crusher if you have to and throw everything you have at the enemies, as if they start bringing down your Merc Booths, chances are Ophelia will cap them with her Well of Souls, making it that much harder for you to recover.
Once you do bring down the Tree Back and its backup units, Ophelia will start throwing out whatever units she has to keep you away from her Stage. This can range from the Reapers and Brood carriages of before to Organists and Lightning Rods and possibly other units as well. Hold the bridge against them until your reinforcements have all arrived, then march on her Stage.
Bringing down Ophelia's Stage this time may be slightly easier than before, as she is much less inclined to keep a rear guard this time around. Use the same tactics as you did in Dry Ice, Wet Graves to bring down her Stage. Retreat if necessary, but keep hammering it with units and you will eventually emerge Brutally Victorious.
Cutscene: After the stage falls, Ophelia will be on the floor again. Eddie walks up to her and says that he is going to finish his father's mission and kill the Emperor. Ophelia explains that the Emperor and Eddie's father were travelling companions. Eddie then says the Emperor came back from the future, but Ophelia explains that he never came back. Eddie explains that Ophelia was with him when they saw Doviculus, who Eddie believed was the Emperor ... but he was not.
Abomination Overdrive[]


This is the last mission of the campaign. Choose your axe treatment and guitar strings carefully, as you will have both a Stage Battle and a one-on-one boss fight to complete. When you are ready, talk to Lita.
Cutscene: Lita tells Eddie she wants to go up the stairs and end it all herself, but she is sick of fighting. Eddie tells her can't run on vengeance forever, that she's a hero, just like her brother. When Lita asks what he is in return, Eddie says he's not in it for vengeance either. Lita asks what he is going up there for if not vengeance, and after thinking for a moment, Eddie replies that he's just cleaning up a mess ... as that's his job.
Eddie heads up the stairs, and finds Ophelia with her back to him. He asks how they are going to resolve this and Ophelia answers that one of them has to die. Eddie says that he nominates the one who sold them out. Ophelia agrees, and implies that Eddie is that person.
Before they can attack each other, Doviculus appears behind Eddie. Eddie remarks that Ophelia must have called her boyfriend to help out, then calls her out as Succoria. Ophelia seems confused for a moment but then Doviculus laughs at the idea of Ophelia being Succoria, confusing Eddie. Doviculus says that Ophelia 'could never hold a candle to Emperor Succoria'. He adds that even though he was pleased that Succoria left the throne unattended when she went into the future, he still mourned her when she never returned, as it seemed like she had failed in her mission.
Eddie, perplexed, states that she did fail, that his father must have killed her ... but it is now clear he is no longer sure.
Doviculus corrects him, hinting at Succoria's true identity, then stating that she succeeded, sending the Tainted Coil many secrets through her own child.
As Eddie comprehends the truth at last, Doviculus thanks him for teaching the Tainted Coil the ways of metal and the Titans, as it will ensure their rule over the Brutal Earth forever.
Eddie attempts to call Doviculus on how Doviculus could smell his mother's blood, but Doviculus interrupts him, saying that he could indeed smell it back at the Temple - just as he can smell it now, coursing through Eddie's veins.
Eddie pushes Doviculus away, rejecting the revelation. Doviculus states he is relieved that it is only Eddie, and not Succoria, who returned to challenge him for the throne. He then asks why Eddie is so surprised when he is wearing her shirt (which we can now see has the name 'Succoria' woven into the design) and is wielding her axe.
While Eddie is distracted by this evidence, Doviculus says that this new Black Tear Rebellion Ophelia has been leading against Eddie can now be crushed the same way it was last time. He then shoves his hand through Ophelia's back and hisses 'by tearing out its heart', before tearing Ophelia's black heart out through her back.
Eddie shouts Ophelia's name as she falls forward, and runs to catch her, but Ophelia's body dissolves into black water as she makes contact with Eddie's hands. Doviculus places Ophelia's heart inside his chest, and then, seeing Eddie's death glare, remarks that what he did was nothing compared to what Eddie did in abandoning her. He then flies up, saying that Eddie turned Ophelia into a little monster and that now, he will show Eddie 'how to make a big one'.
Doviculus then begins playing a solo on his guitar, which begins summoning a massive beast from the Sea of Black Tears. Eddie retreats back across the bridge to where Lita and Mangus are, as Doviculus's monster rises out of the Sea.
STAGE BATTLE: vs the Tainted Coil at the Sea of Black Tears[]
This is it, the final Stage Battle of the Campaign. There is no enemy Megastage - rather, you must bring down the hydra-like monster Doviculus has summoned from the Sea of Black Tears.
To do this, you must attack its left and right heads until they droop down at just the right height for you to drive your Deuce into them, via the ramps at the left and right edges of the battlefield. Depending on the difficulty, you have a limited amount of time to do this before a head recovers, forcing you to attack it all over again. Try to have the Deuce near a ramp and ready to go before a head goes down.
Before you do this, capture all the Fan Geysers and choose a rally point somewhere where you can easily get to any of your Merch Booths or your Stage. Then focus on building and upgrading your army and massing up your Fans.
Doviculus will harass you constantly throughout with troops that are spawned directly onto the battlefield via syringes fired from the monster's mouth. These syringes have a distinctive sound when fired, so look around for them when you hear it and destroy whatever Coil units are spawned.
There will also be large black grunge balls fired at your units at regular intervals, so do your best to keep them mobile, as they do a fair amount of damage.
Doviculus himself will from time to time fly down and personally attack you and your forces. He is more like Lionwhyte in that he prefers to attack with his weapon or use Shockers rather than his solos. Fight him off with Double Team attacks with your stronger units.
Once you are ready, send in your units to bring down one of the heads. When they do, drive your Deuce up the corresponding ramp into the side of its head. Be warned that when you do this successfully, it will cause a group of Doviculus's higher tier troops like Skull Rakers and Hate Cages to spawn near the remaining head, in addition to the units still being deployed by syringes. You can attempt to destroy these units so you can get to the other head, which is possible but can be tough on higher difficulties. You may want to set some expendable units on the second head just before you drive up to take down the first one, so hopefully, they will bring it down just as you take out the first head. This allows you to immediately drive up the other ramp and quickly get the second head before the spawned units have a chance to attack your forces. The success of this strategy is down to timing and luck, so if the second head comes back up before you can get to it, you will have to deal with the instanced enemies before you can get at it. Alternatively, you can try using your army to run interference for another group of units (like Roadies) who you can send to attack the second head while the enemies are distracted. Either way, bring down both heads and you will have more or less won the Stage Battle.
After Doviculus retreats, drive your Deuce up the center ramp and into the middle head to complete the Stage Battle part of the mission.
BOSS: Emperor Doviculus[]
After a short cutscene you will fight Doviculus one-on-one. Depending on how comfortable you are with blocking and evading, you can fight him head on, or use Shockers and Earthshakers to deal damage from a distance. Be aware that Shockers do not stun him and if he gets into melee range, he will try to combo you, which is about three hits before you will be able to block. If you are blocking a lot of his attacks, or comboing him, he may try to break it by using a power attack, so roll backwards when you see him jump up in the air. Having the Soul Sucking axe treatment helps keep your health up (if you are fighting him with axe attacks).
Once you deal enough damage to him, he will jump into the background and hang on some chains. At this point, Druids and Battle Nuns similar to those you fought at the start of the game, will begin spawning in to attack you. In order to continue fighting Doviculus, you need to use Shockers on him to knock the chains off, but you do not want minions around when he comes loose. Shock Doviculus and avoid his minions until only one chain is left supporting him. Then kill off all his minions and before more can spawn, shock Doviculus's last chain off.
You will then fight as you did before, and once you do enough damage, he will go back on his chains. This time, in addition to minions spawning, there will be grunge balls that shoot down on chains that go into the floor, so avoid them while you are dealing with minions and Doviculus's chains.
Once you get him off the chains, you will fight him one last time. When you do enough damage, he will return to his chains and this time, you will have the minions, grunge balls and at the far left and right sides of the area, a Bleeding Death will reach through the window to attack you if you move too close. Stay away from the edges, avoid the grunge balls and keep shocking Doviculus. He will not attack you once you bring him off the chains this time, so do not worry about killing the minions unless you need space (or health, if you have the Soul Sucking axe). When you see Doviculus off the chains, run up to him and attack with the axe to defeat him and complete the final campaign mission.
Cutscene: Eddie's axe slices straight through Doviculus's neck. Eddie yells 'DECAPATATIIIIIIIIIIION!' and stamps his foot, causing Doviculus's head to fly off his shoulders, showering Eddie with blood as he yells.
Eddie then rips open Doviculus' chest, pulls out his heart and throws it away. He then pulls out Ophelia's, and it dissolves, revealing his mother's necklace.
The huge beast summoned by Doviculus then falls back into the Sea of Black Tears, pulling Eddie down with it. The Sea tries to pull him down, but Eddie manages to resist. He swims to the bottom of the sea, where he at last finds the real Ophelia, lying unconscious on an altar. He puts his mother's necklace on her, and swims up with her to the surface, but black tendrils from the depths of the Sea grab him and pull him down. He lets go of Ophelia and is sucked into the abyss, but suddenly a hand - Ophelia's hand - grabs hold of his stage pass and pulls Eddie up. They swim to the surface together and reach land, where they both lie on the ground, and - reunited at last - share a passionate kiss.
Brütal Legend Walkthrough[]
- Achievement Unlocked: Legend
- Achievement Unlocked: Roadie
- Achievement Unlocked: Groupie
It turns to a cutscene where Ironheade are back at Bladehenge. The stage has been set up, ready for a celebration. A Bouncer steps on stage and says that they are here to celebrate a great man and a true hero, whose name was Lars Halford. They pull off the sheet and show the huge statue of Lars. Then the Fire Baron walks up on stage and says that when Lars fell, everything seemed lost, but there was still another great warrior in their midst, and her name is Lita Halford. She then steps onto the stage and everybody cheers for her. She tells everybody that Lars was a better person than she was, as he saw goodness in people, and all she did was doubt them, and she hopes that everybody can stand together as one.
Eddie can be seen backstage packing up. Mangus approaches him, and asks why he isn't at the party. He was more comfortable backstage. Mangus then hands Eddie his tour book. Inside is messages from everybody, since they will miss him. When he lowers his book, his army is infront of him, ready to say goodbye. But Eddie isn't going to go far, he just has a few things to do first. He then tells Mangus that he does not need to load up anything anymore, and that they are staying at Bladehenge for good. The tour is over. As Eddie walks to his Deuce, his opening monologue can be heard in the background. He drives off into the distance, and Ophelia watches him go.